Ticket personalisation
The following step‑by‑step guide explains how to configure ticket personalization and shows how the end user can ultimately personalize their tickets.
Configure personalisation
1. Define input fields
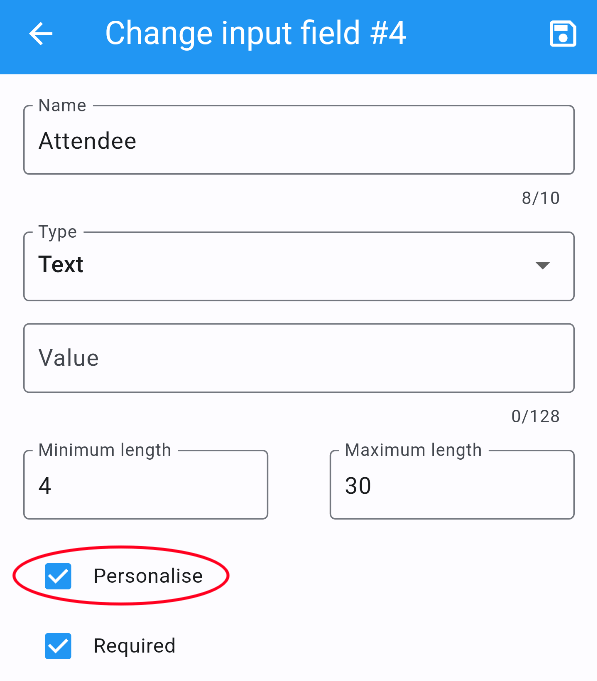
The first step is to define 1 or more input fields.
If the Personalise checkbox is unchecked, the field appears on the order form. Its value will be the same for all tickets and cannot be changed after the order is submitted.
If the Personalise checkbox is checked, the field must be personalised for each ticket.
2. Use in ticket types
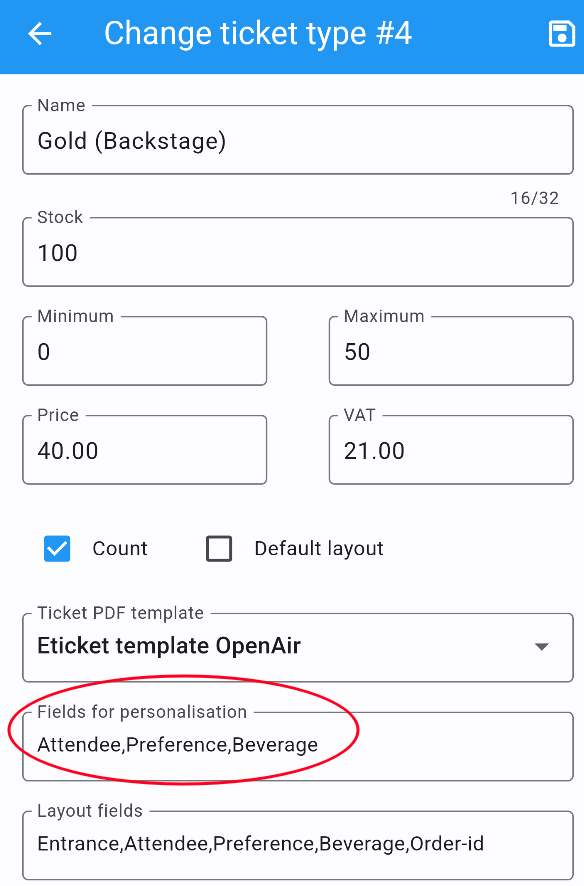
Connecting input fields to ticket types is the next step.
It is possible to associate different input fields with different tickets. And not all tickets need to have personalisation fields.
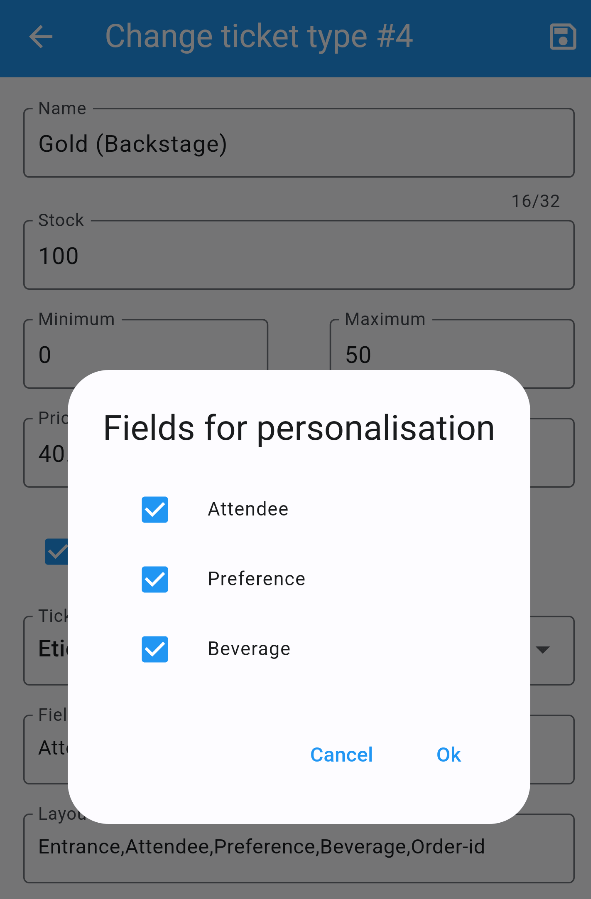
Simply tap Fields for personalisation and choose the fields you want to use. You can drag and drop them to change the order.
3. Use in thank-you-page
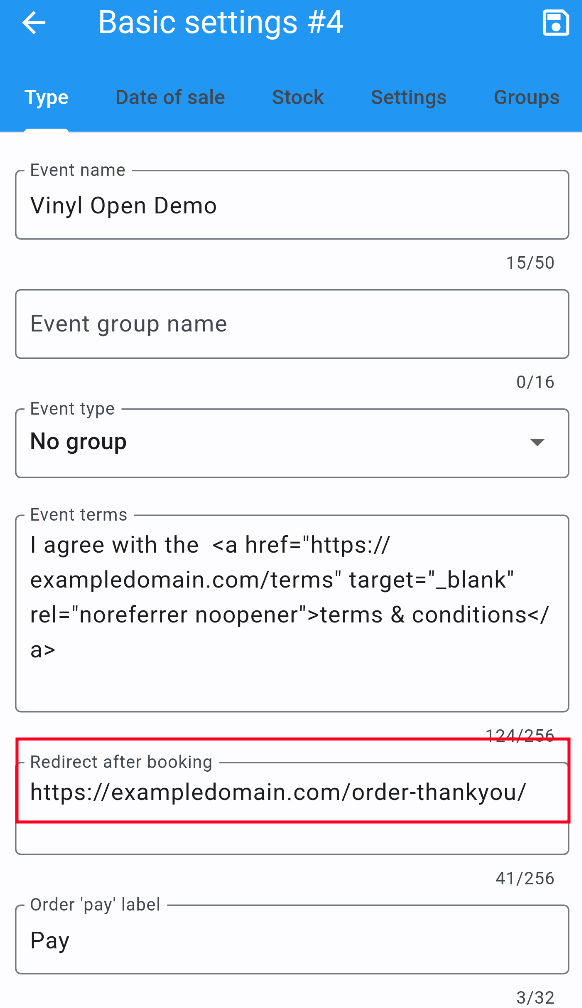
The next step is to edit the WordPress page referenced in the Redirect after booking field.
Insert the shortcode [fe_personalise] anywhere on the page.
You can reduce server load by up to five requests by using the shortcode [fe_personalise cdn].
Instead of pulling the supporting files from your own server, the shortcode loads them from Cloudflare’s global CDN.
You can also use the dark attribute in the shortcode.
The default theme is light, but if your site has a dark background you can switch to the dark theme.
You may combine it with the cdn attribute, resulting in a shortcode like: [fe_personalise cdn dark].
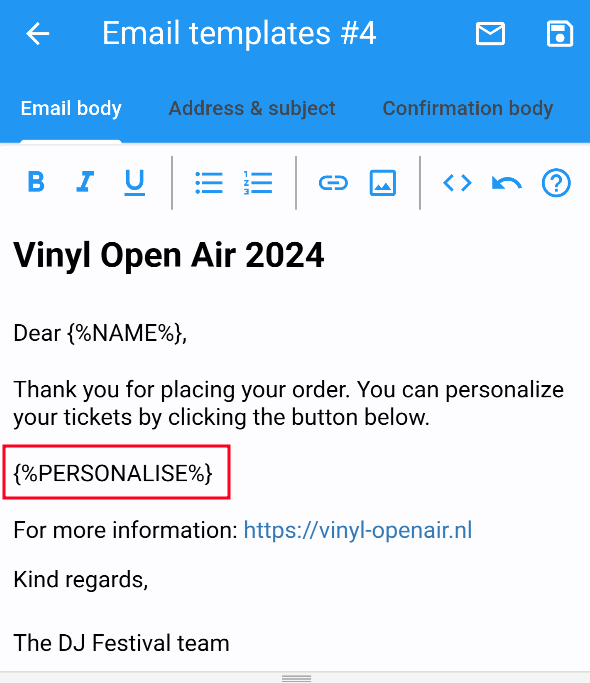
4. Use in order email
Insert the keyword {%PERSONALISE%} anywhere in the body of the email.
The customer will see a button in the email that, when clicked, takes them to the page referenced in step 3.
5. Use in eticket PDF
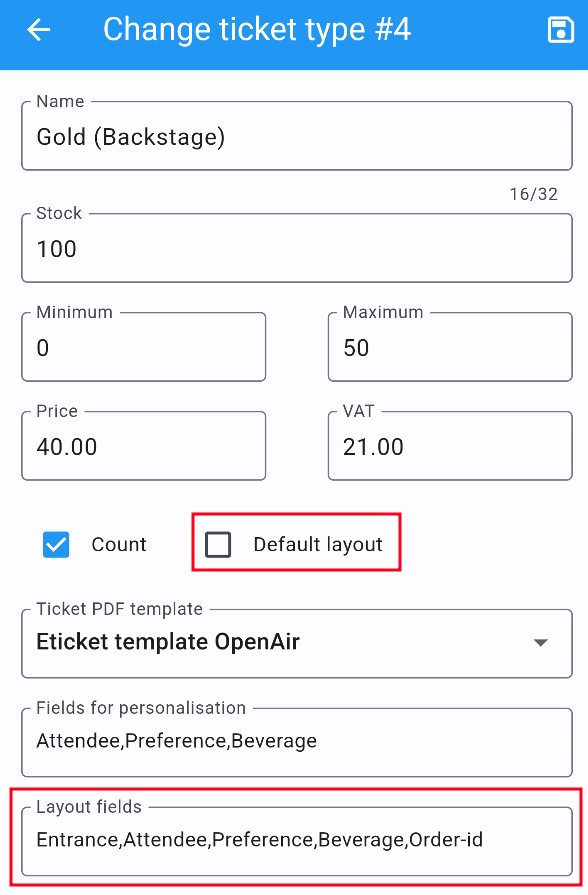
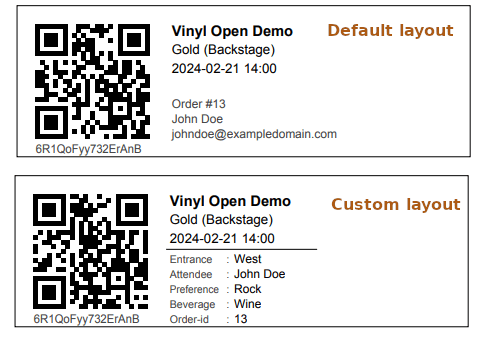
Checking the Default layout checkbox causes the default QR-code info block to be printed in the eTicket PDF.
If you deselect it, tap Layout fields and choose up to 6 fields you want to print on the eticket PDF. The order of the fields in the ticket layout runs from top to bottom, and you can change the order if needed by dragging the fields to the desired position.
Use personalisation
Below, we use the Openair event that is part of the demo data. You can add your own sample order by going to FE Admin
and pressing the + button in the Orders tab to add a new order. Next, click on the triple dot icon of the new
order and select Share PDF tickets.
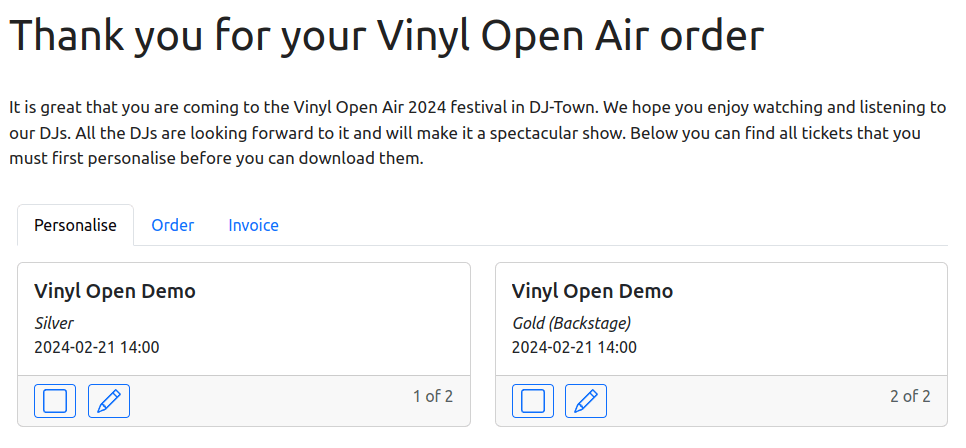
The App will respond with: Personalisation needed. Click Personalise and and you will be taken directly to the personalisation page.
Interface
|
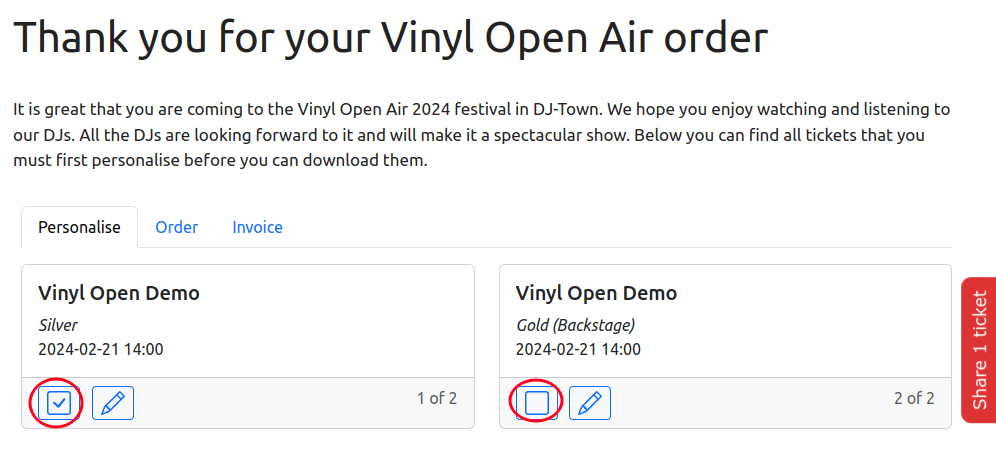
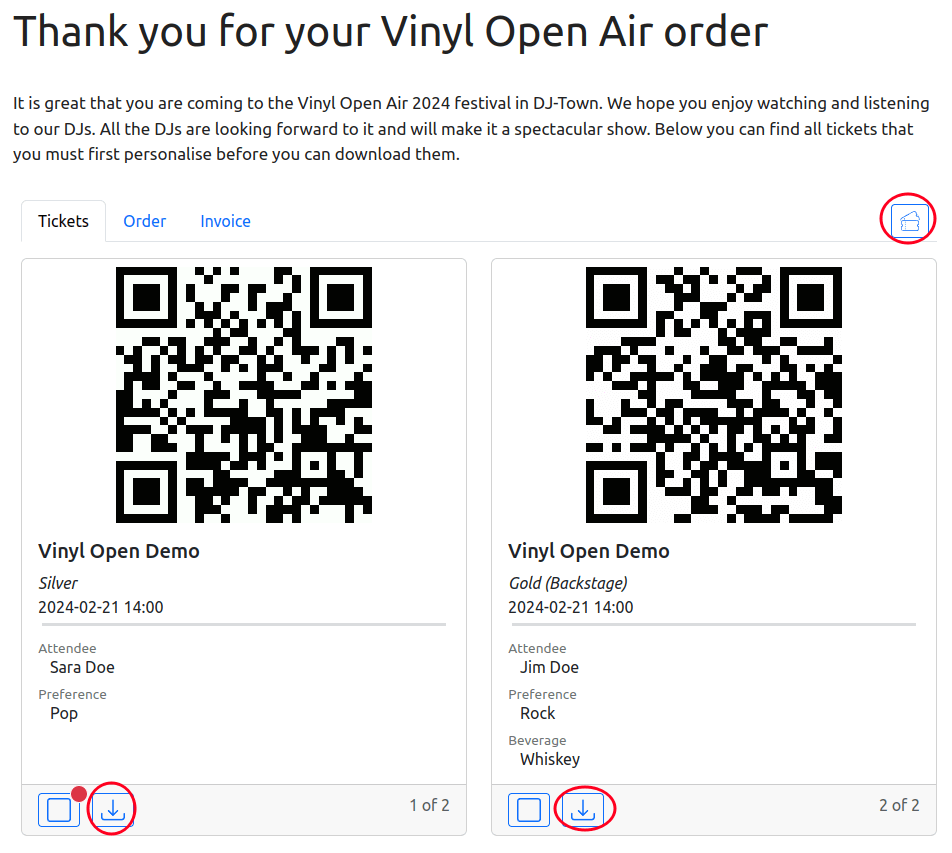
The personalisation section is fully responsive. Depending on the width of the screen, it can display 1, 2 or 3 ticket cards side by side. Once all the tickets have been personalised, you will be able to download them if you wish. In most cases, however, it is not necessary to download the tickets, as the QR code will appear on the screen and can be scanned at the entrance to an event.
Share tickets
|
If you have purchased a number of tickets, it is possible to share 1 or more with other people so that they can personalise their own tickets. Once you start selecting tickets, a red button will appear on the right hand side of the screen.
|
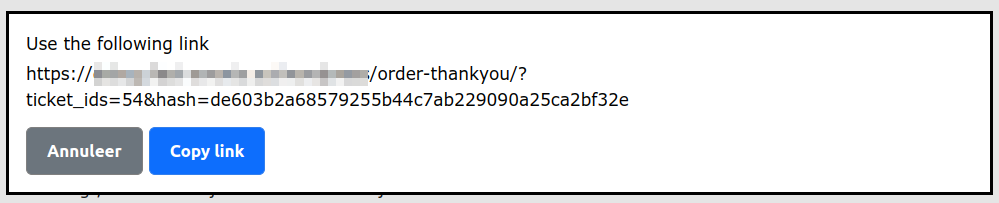
Tap, in this example, the Share 1 ticket and a popup dialog will show the link to share. Copy it and share it with another attendee so they can personalise their own tickets. After sharing, each shared ticket will have a small red badge attached to it to remind you that it has been shared.
The person receiving the share will see a similar screen, but there are some differences:
It is not possible to select and share tickets.
The Order and Invoice are not available.
Personalise ticket
|
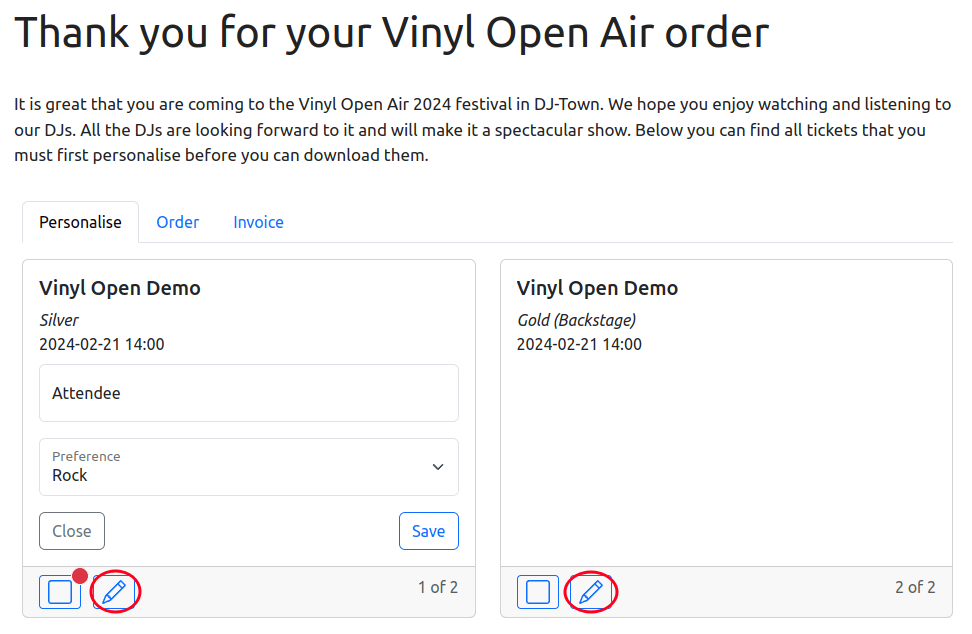
Tap the pencil icon to personalise the ticket and the Save button to save it.
Once the ticket has been saved, it will no longer be possible to edit it.
The pencil icon is no longer available.
|
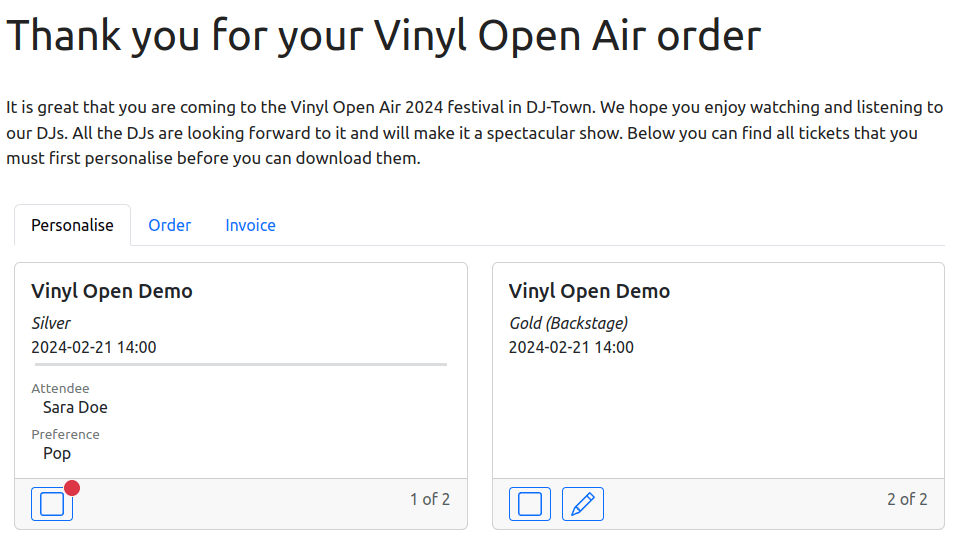
You can, of course, personalize shared tickets yourself. However, once you’ve done so, anyone who receives the shared ticket will see the data if they try to personalize it. Conversely, if another person has already personalized a ticket and you attempt to personalize it, you’ll receive a warning that the ticket has already been personalized. The existing data will be displayed, and you won’t be able to edit it.
Once all tickets have been personalized, the QR codes become visible.
Download tickets
|
Download all tickets by tapping the tickets icon at the top right,
or download an individual ticket by tapping the download icon on that ticket’s card.
Order information

|
A simplified order overview that is hidden from share recipients.
Invoice

|
This tab is visible only when invoices are enabled at the event level. See Event settings. Fill in the form, click Save, and you will be able to download the invoice.
Scan App
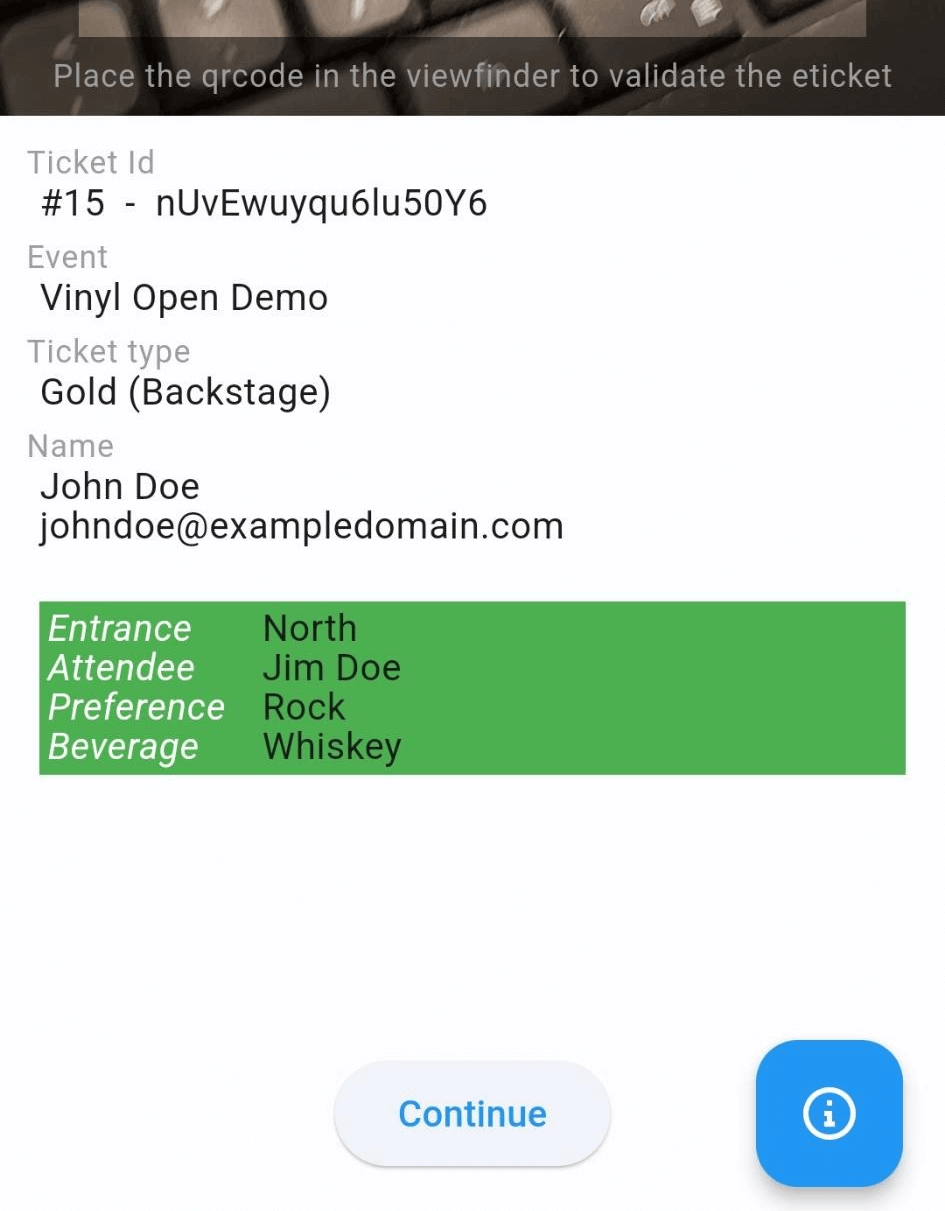
When you scan a personalized ticket, all of the data appears in the green box on the scan screen.
Tips
Note
The personalization module can also be useful for events that don’t require personalization. It lets customers simply present the QR codes at a scanning point without printing them, or download all tickets—or individual tickets—if they wish.