Scan App
Check in visitors easily with our Android or IOS App; no expensive scanning terminals required. The App is available for Android 12 and later and IOS 15.0 and later.

|

|
Configuration
Add/edit checkpoints
There are 3 possibilities to configure the app:
Manual configuration
Scan a configuration qrcode
Scan the configuration qrcode from an image file.
|
|
|
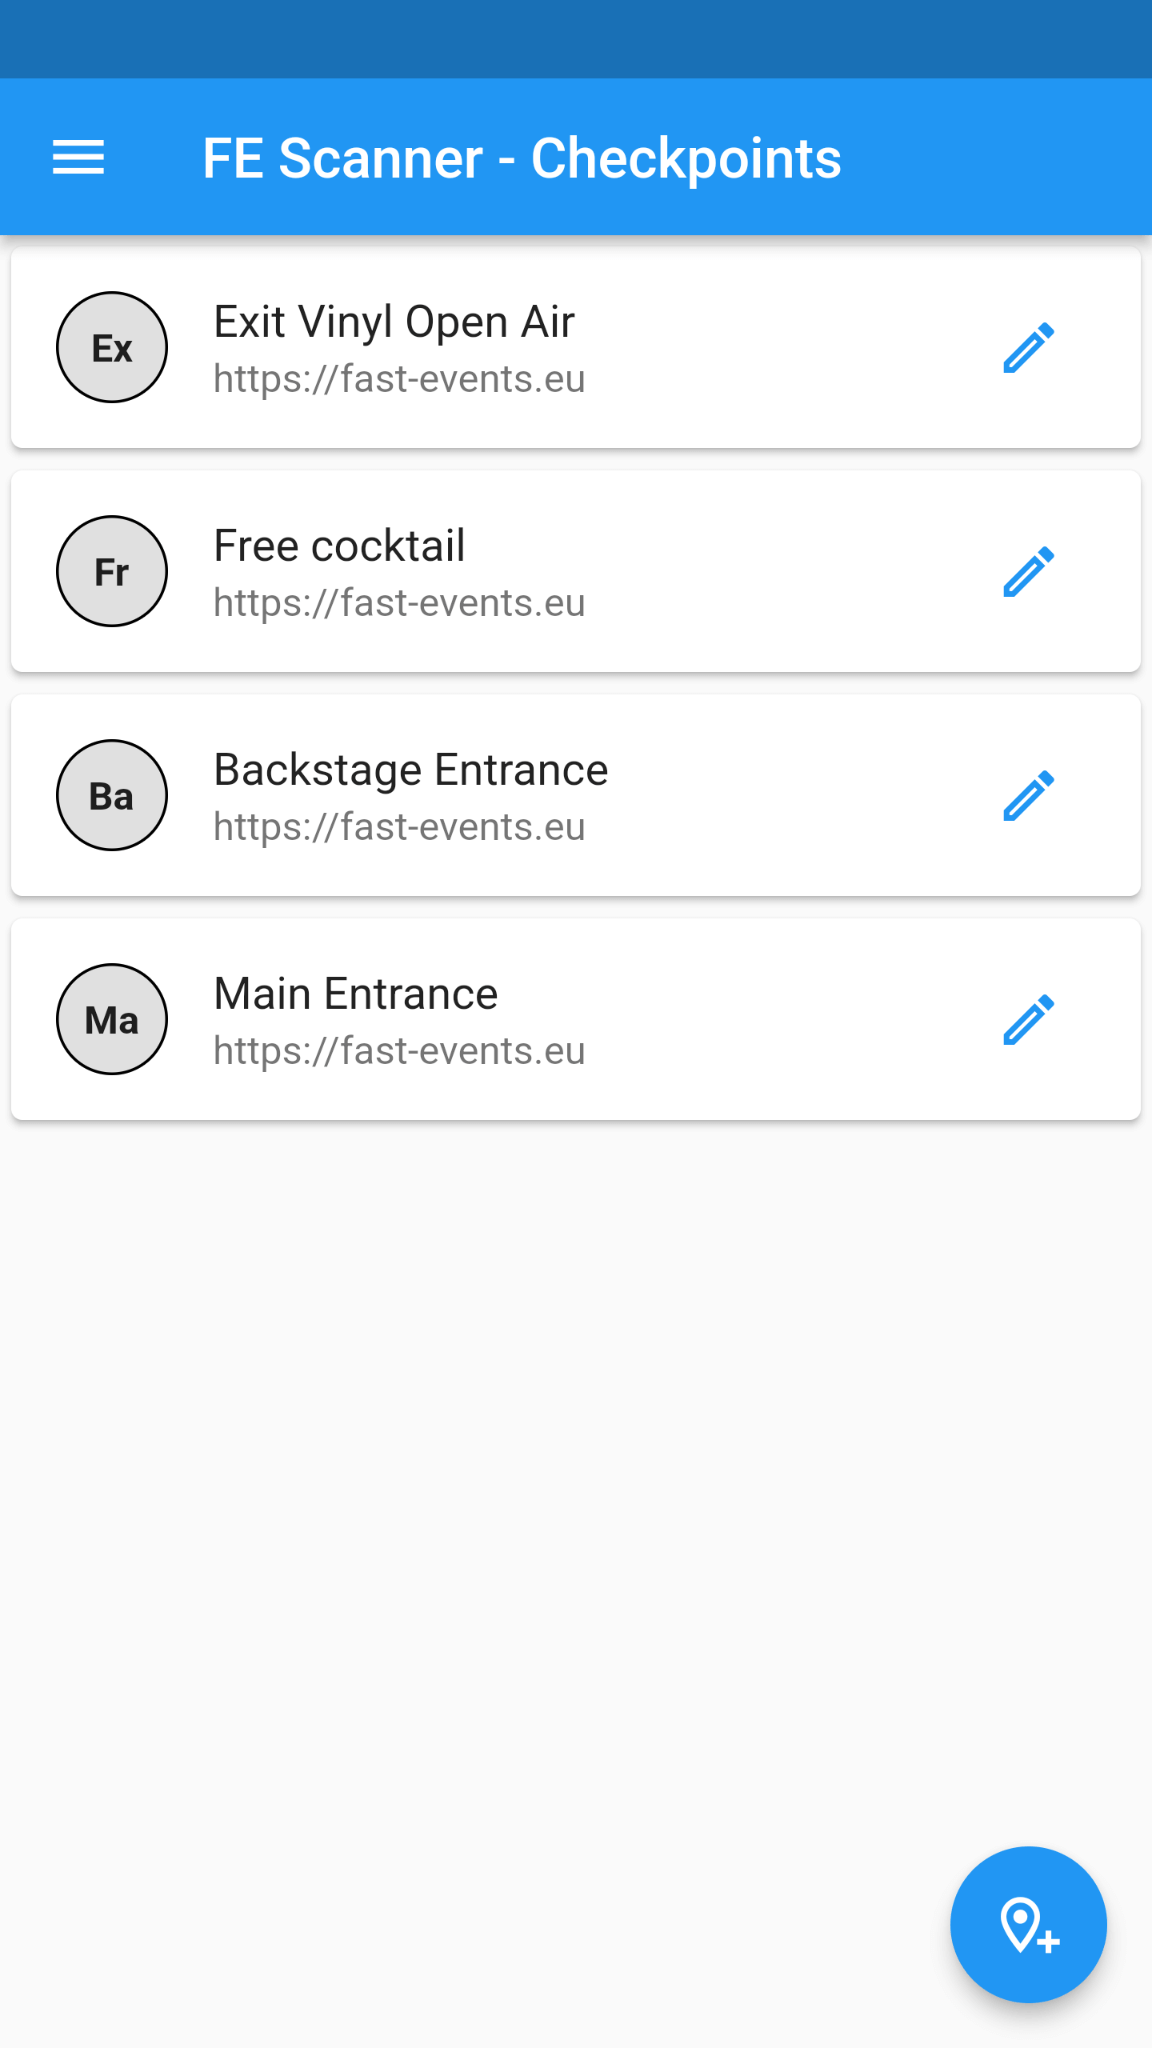
Adding or changing checkpoints is the first menu item in the navigation drawer (top left).
You can add a new checkpoint by pressing the new checkpoint button (bottom right) or edit an existing checkpoint by pressing the pencil button.
The quickest way to configure the App is to scan a configuration qrcode,
which you can copy from the Qrcode popupmenu item in the Scan keys overview when editing an event.
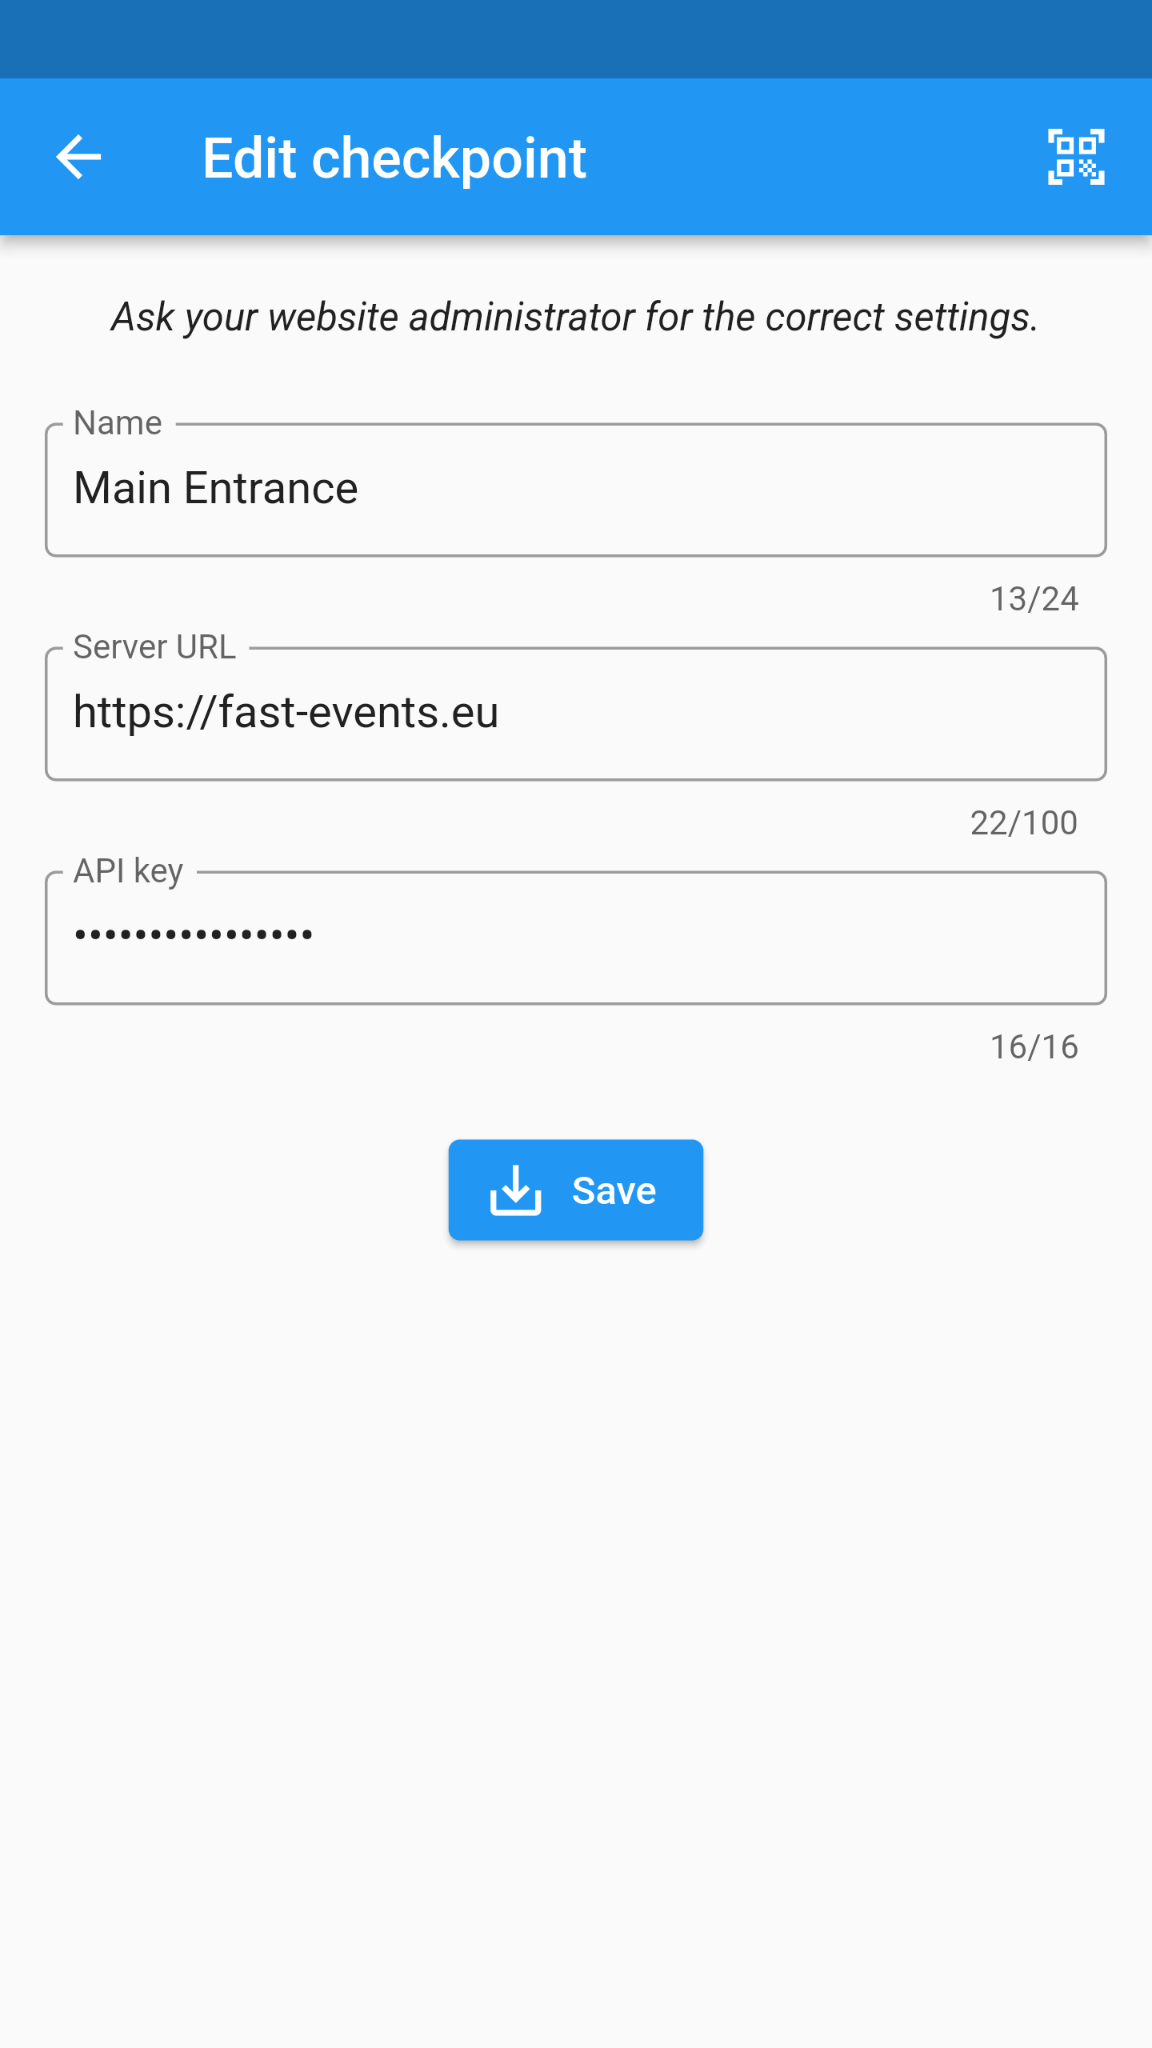
Pressing the QR code button (top‑right) in the add/edit checkpoint screen gives you two options:
scan a configuration qrcode with the camera, or load a configuration qrcode from an image file.
- Server URL
The URL where you have installed WordPress. For example
https://exampledomain.com. Only secure connections (https) are allowed.- API Key
The
Scan keyas defined in the Scan keys overview.
Language settings
The Language settings menu is located in the navigation drawer (top left icon).
FE Scanner supports standard 4 languages: English, Dutch, German and French. You can add your own language by following the next steps:
Make sure you have a Github account.
Check the
languagesfolder of https://github.com/fe-data/fe-scanner-languages if your language is supported.If not, login with the Github account at https://gitlocalize.com/repo/10688 and check if the translation is in progress.
If not, create a new issue in https://github.com/fe-data/fe-scanner-languages/issues requesting the new language code. We will give you the role of moderator for the new language. Use the two letter codes from this source. Only LTR-languages are supported.
As a moderator you may receive review requests from other translators. Process them and when you are happy with the update create a pull request. Mind you:
We will only process pull requests that originate from Gitlocalize, and will not process pull requests from private forks.
For initial translations, we will only accept a full translation of the entire file. Partial translations will be rejected.
Once the pull request has been processed, the new translation will be available in the app’s settings. Reload the translations and select the new language.
There is only 1 moderator per language.
Use the Download languages button to download new languages or to update the current version, and then optionally choose another language. If you are asked to restart the app, make sure the app is completely removed from memory, then restart the app and optionally select a new language.
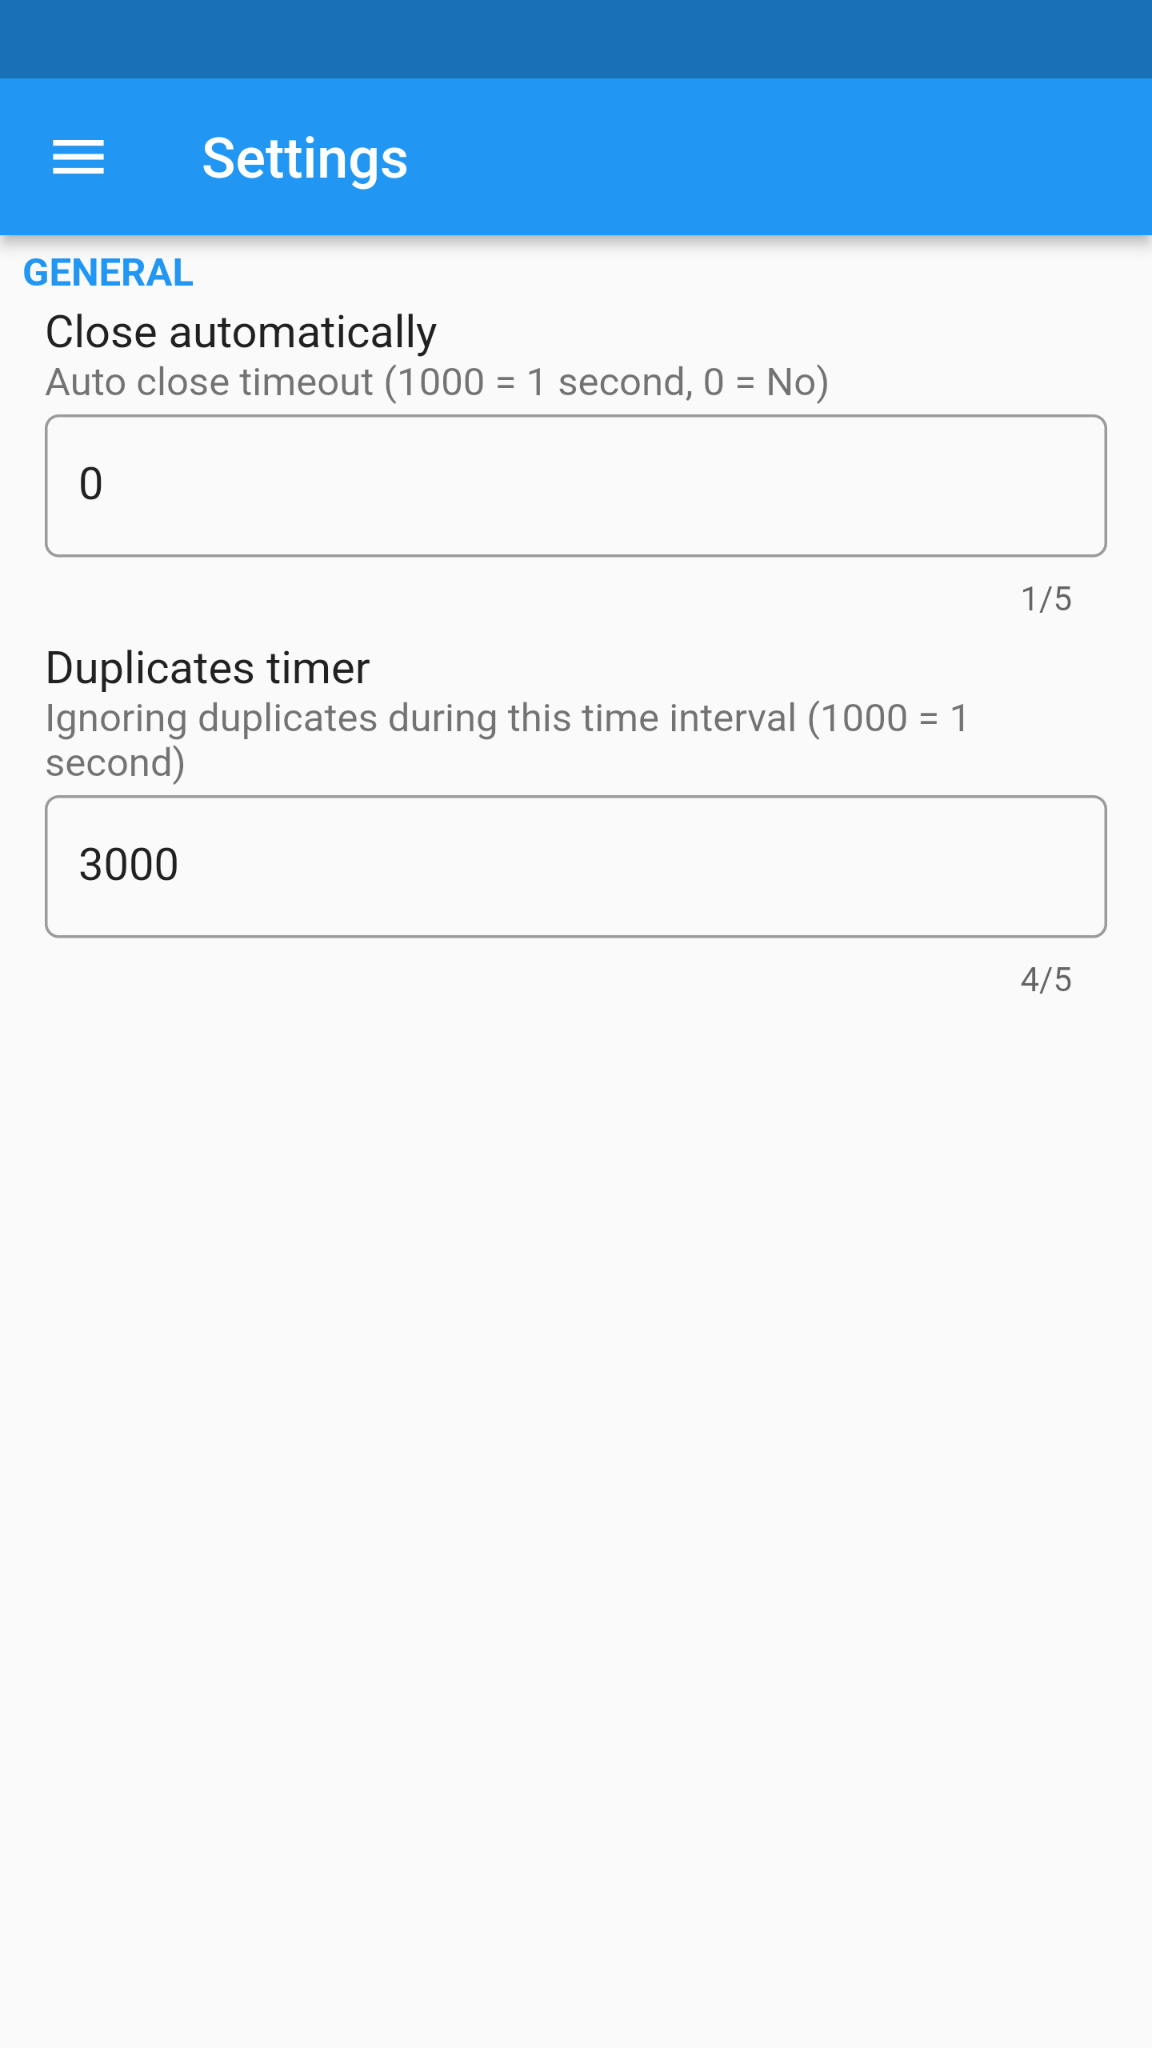
General settings
The General settings menu are located in the navigation drawer (top left icon).
- Autoclose timeout
Normally you will need to press Continue after each scan to start a new scan. You can also set the dialogue box to close automatically. If you enter 1000 here, the dialogue box will close after 1 second and the Continue button will not be displayed. This allows you to operate the phone with one hand. However, if a scan is invalid, manual intervention is required and the Continue button will be displayed.
- Duplicates timer
If a qrcode is scanned within this time window, the qrcode will be ignored. 1000 equals to 1 second.
Usage
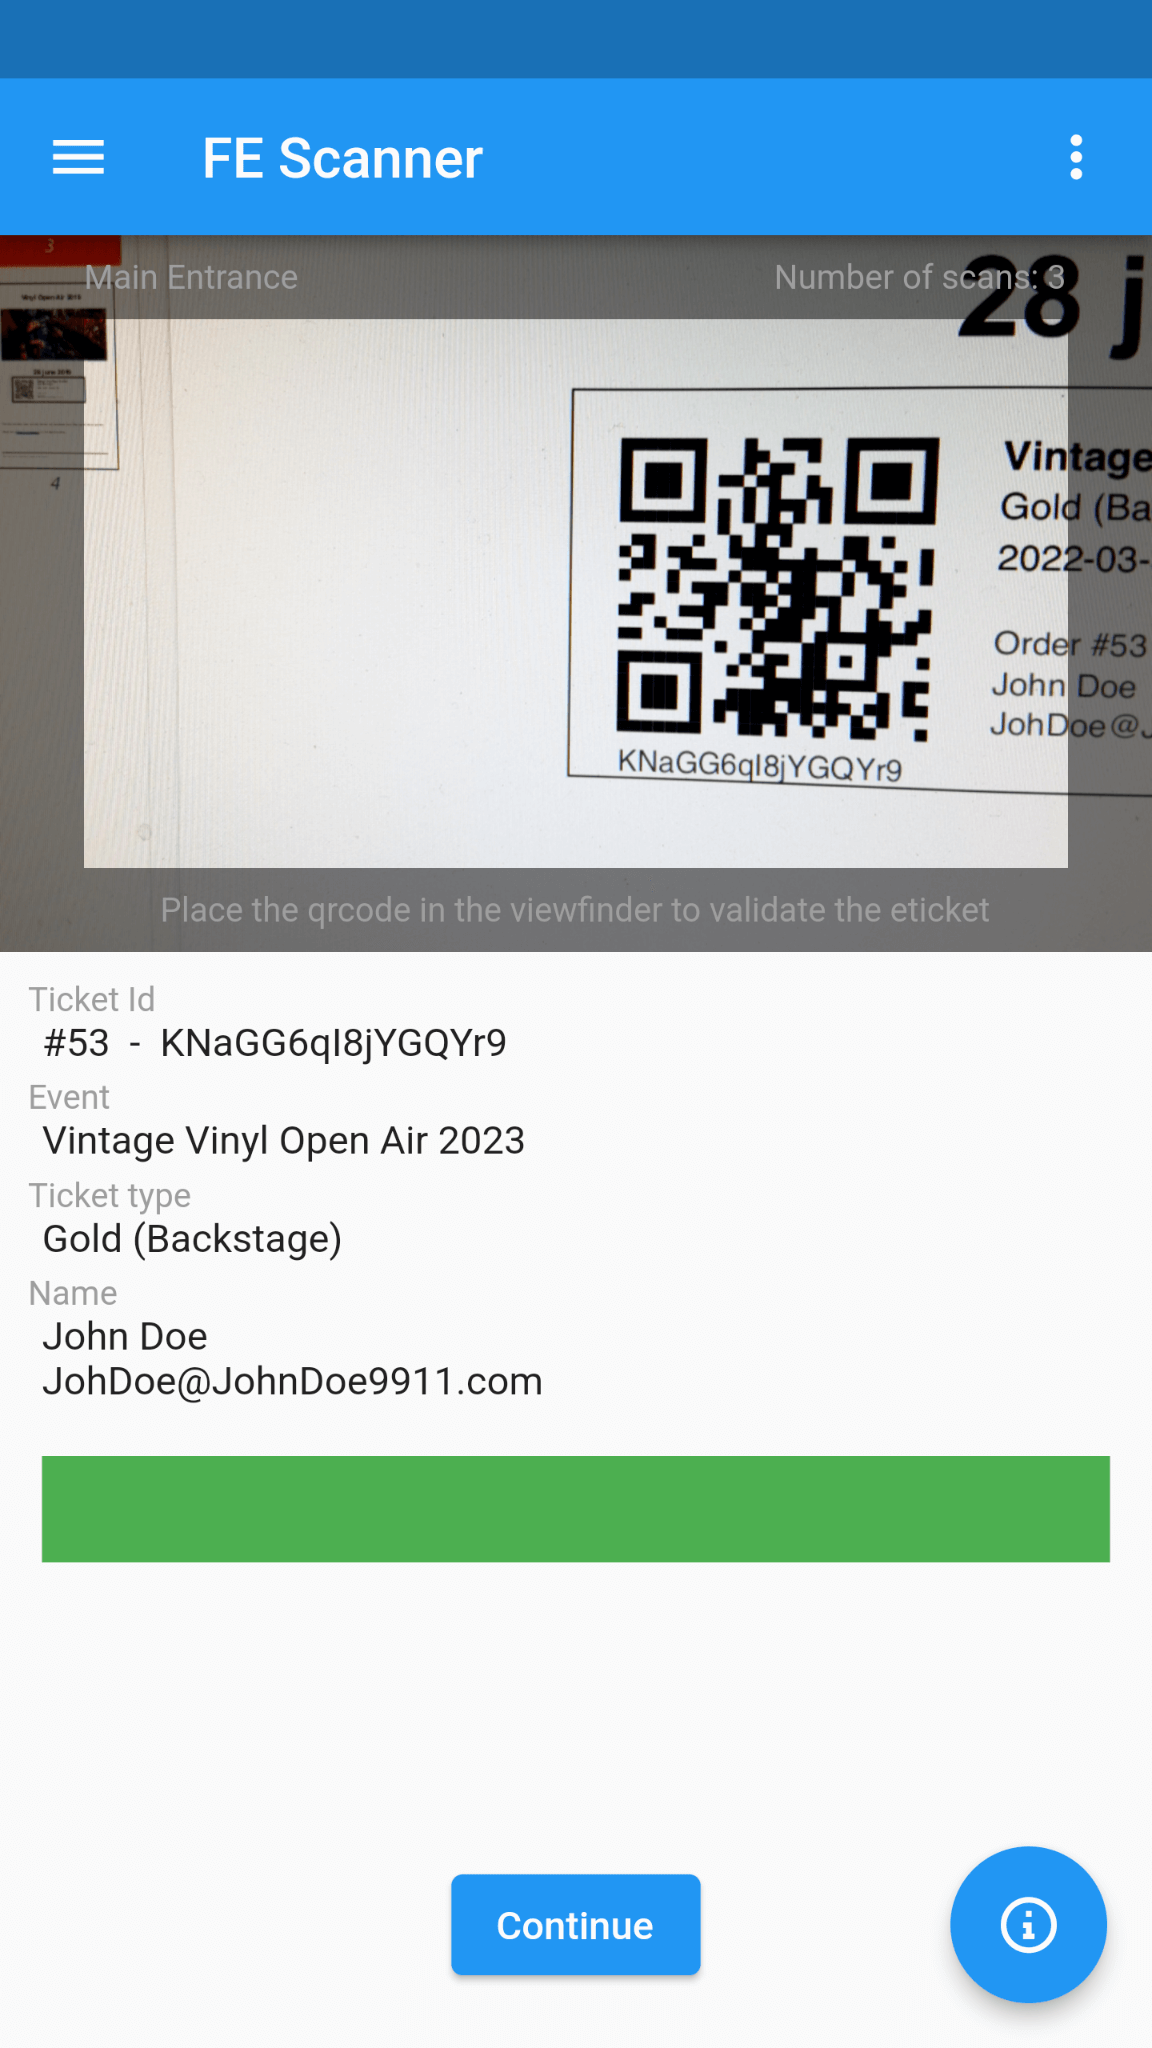
One of the advantages of using QR codes is that it doesn’t matter how the QR code is presented to you - upside down, diagonally - it will always deliver a scan.
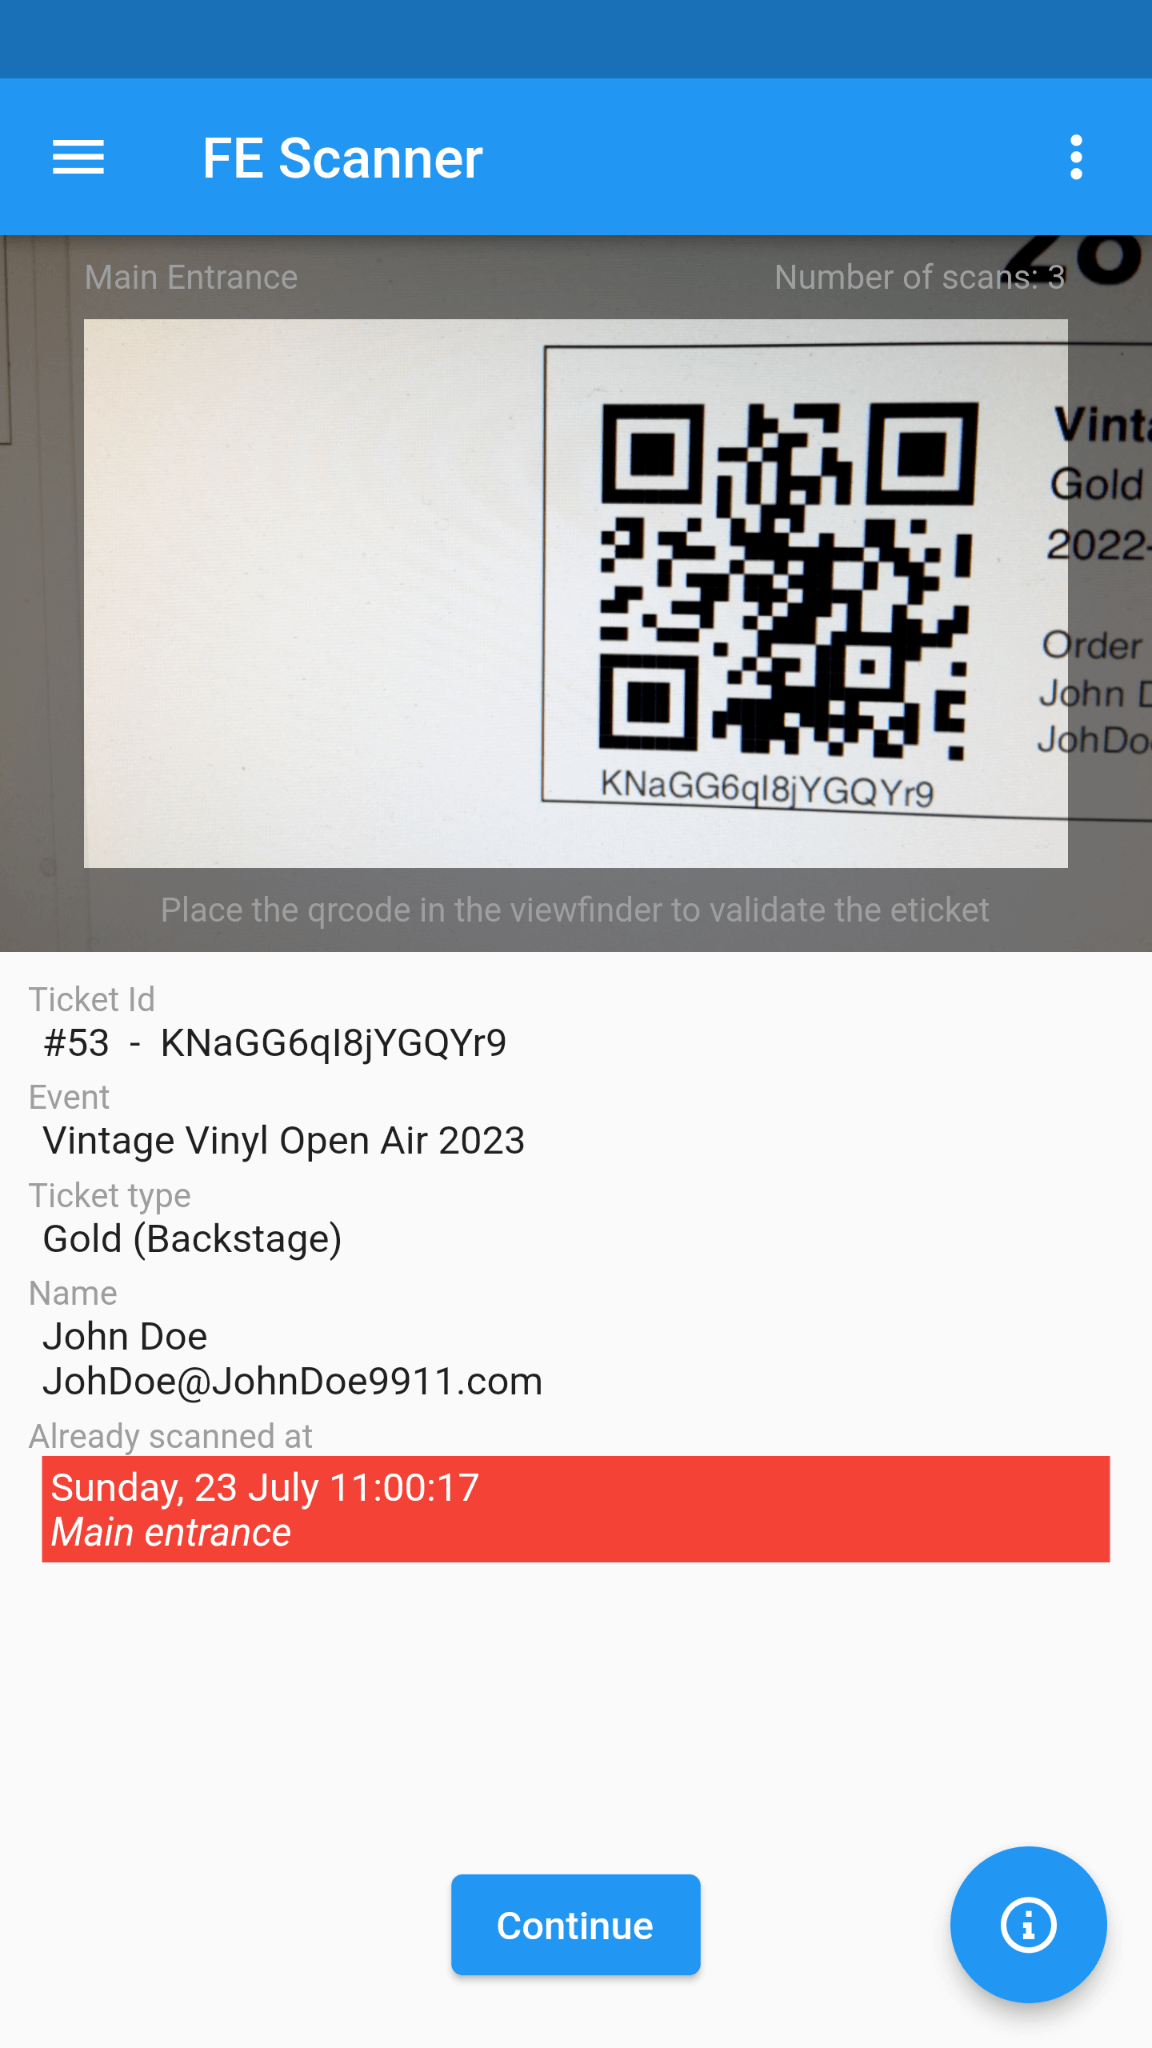
If the scan is valid, a green bar will appear and the phone will make a short beep. If the QR code has already been scanned, a red bar will appear along with the date and location where the ticket was previously scanned. The phone will not make a sound, but will vibrate.
|
|
|
You can scan one step at a time.
For example: you can only scan the ‘Gold (Backstage)‘ ticket at the backstage entrance if it has already been scanned at the main entrance.
This requires a different Scan key at the main entrance and the backstage entrances.
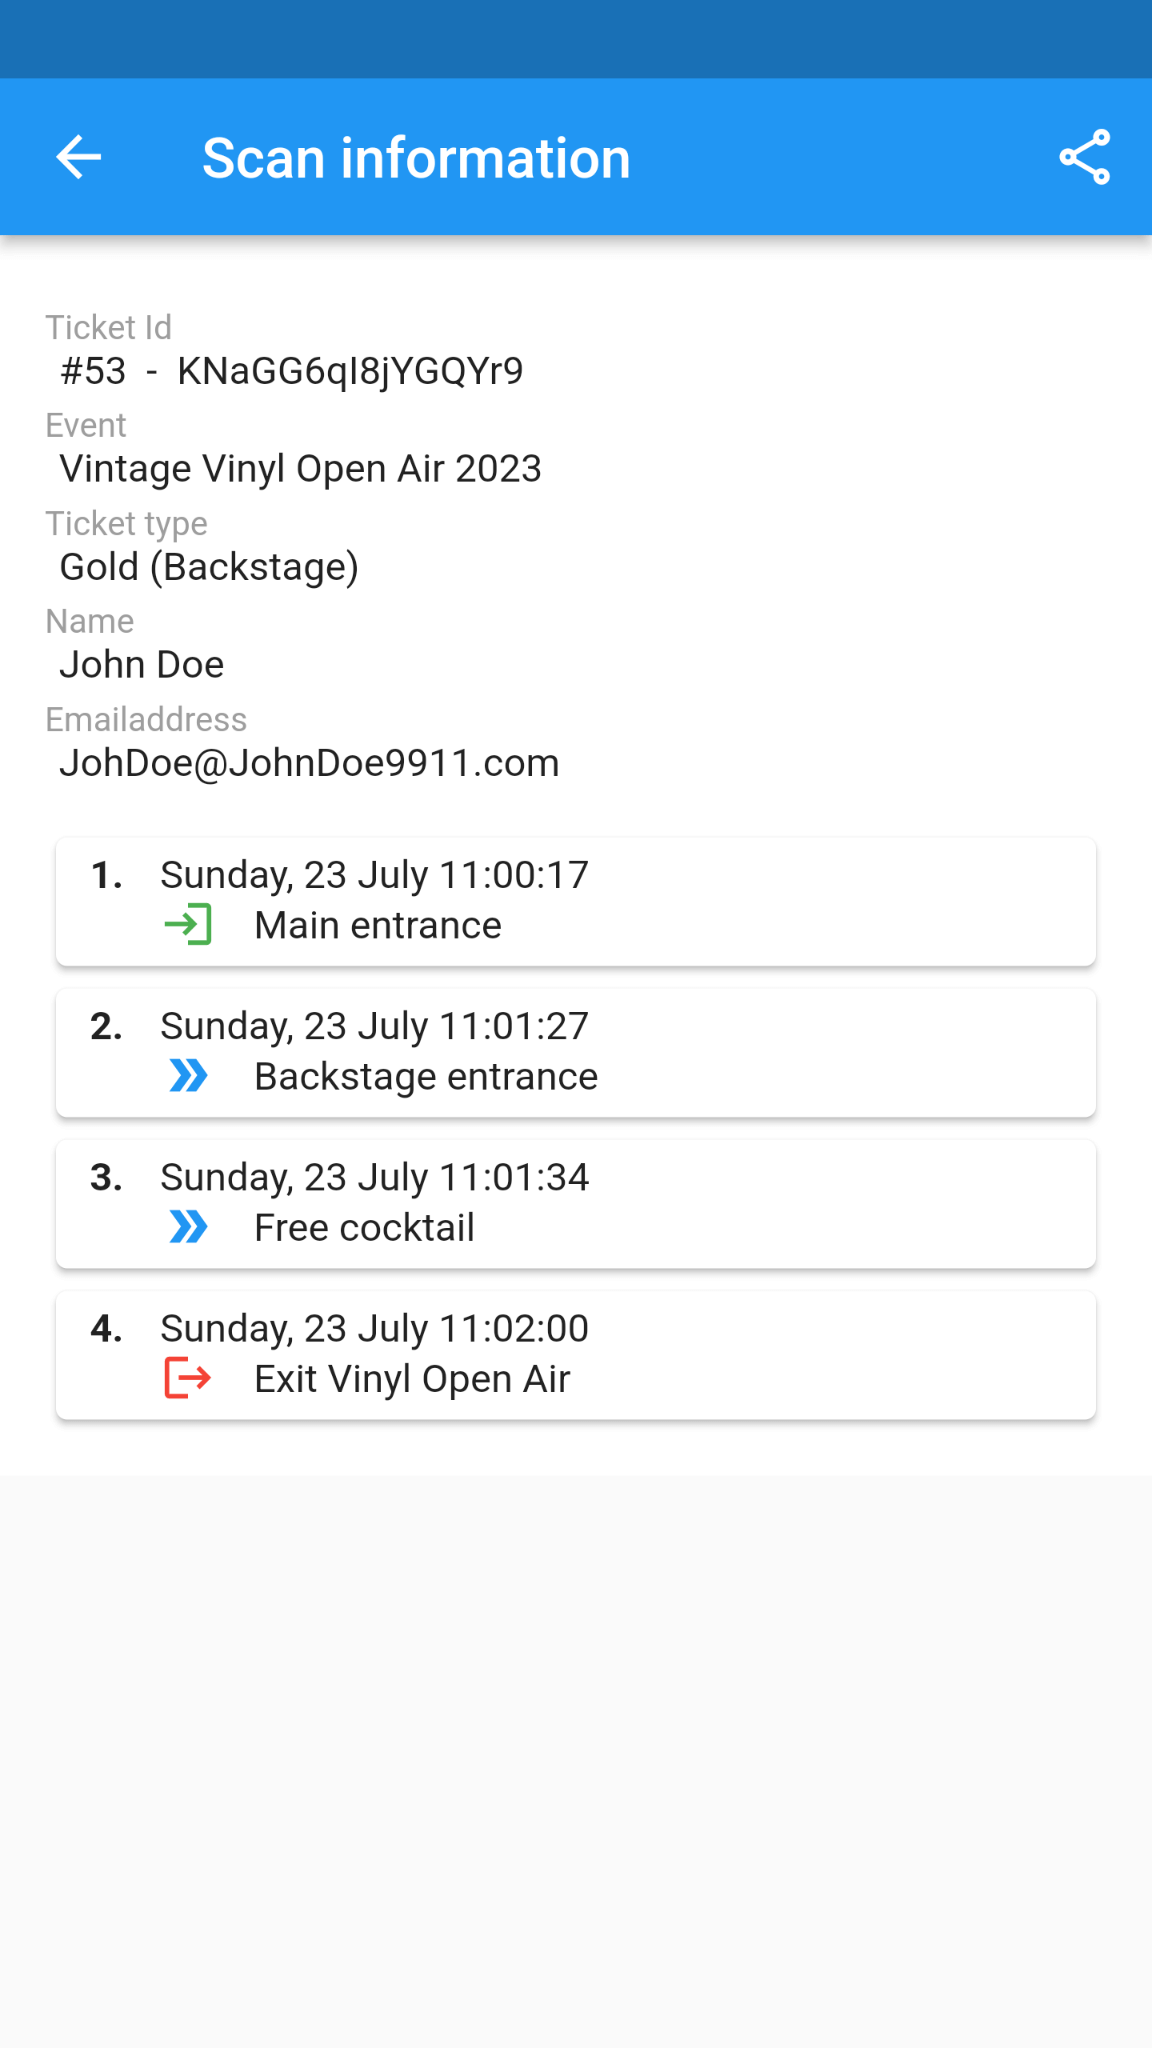
See this screenshot.
The first entry will scan all tickets at the Main Entrance and the second entry will scan only ‘Gold (Backstage)‘ tickets at the Backstage Entrance.
If the ‘Gold (Backstage)‘ ticket is first presented at the Backstage Entrance first, it will result in an invalid scan as it has not been scanned at the Main Entrance.
You can get an overview of all scans after a valid or invalid scan by pressing the info button (bottom right). This can be useful, for example, if you are organising a cycle race (or any other event) where participants pass through several checkpoints along the route, where their ticket is scanned. At the end (finish), the participants receive a medal if they have passed all the checkpoints. You can easily check this with the info button after an exit scan.
If for some reason the scanner can’t read the QR code, you can enter the Ticket ID manually as a fallback. Press the tripe-dots-button (top right) and choose Enter qrcode to enter the Ticket ID (found under the QR code) and press OK.