Settings
The plugin’s settings apply to all events. Before you start selling etickets, make sure that all necessary settings have been entered.
By clicking on the tabs on the left you can change various parts of the settings. Then press Save to save the settings.
|
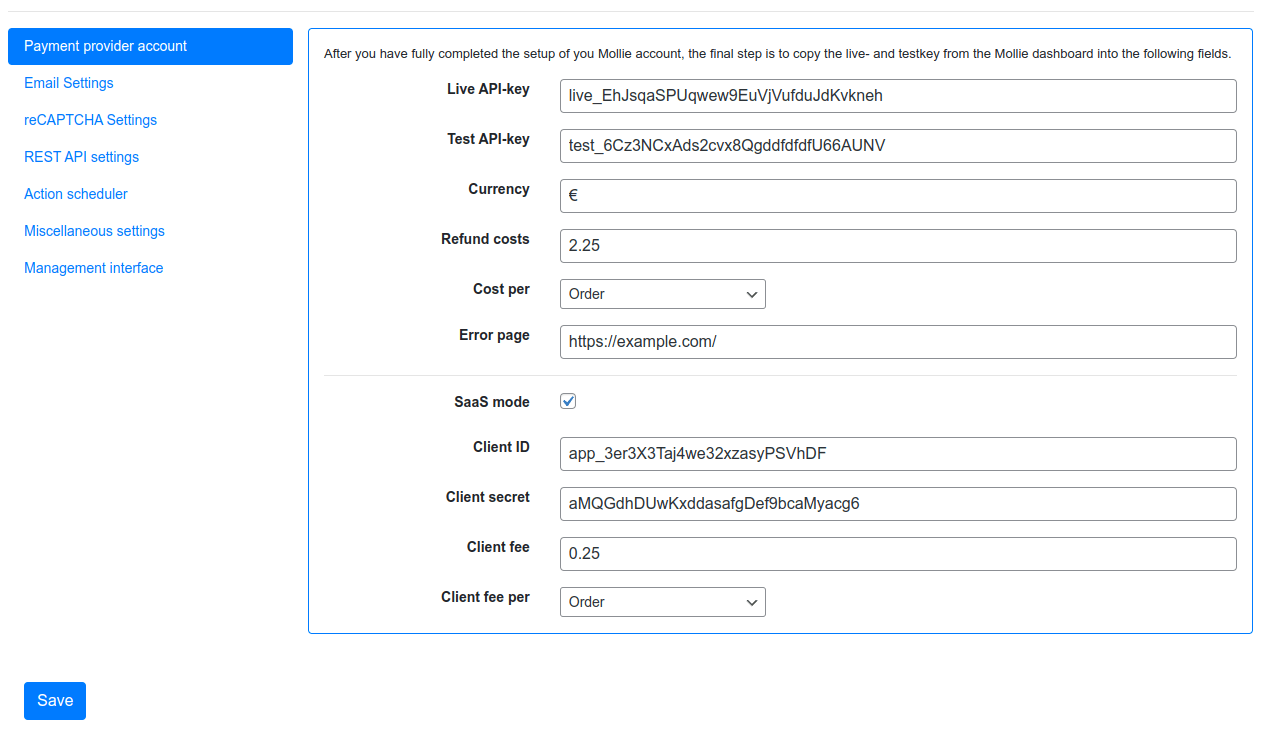
Payment provider account
Fast Events is integrated with Mollie, Paypal, and Stripe as payment provider. See here for detailed information on how to configure one of the payment providers.
Wait mode
If this is turned on, Fast Events waits until the payment is confirmed. The maximum waiting time is 5 seconds. If the order is not confirmed as paid within 5 seconds, the user is redirected to the error page; otherwise, the user is redirected to the Redirect after booking page of the event. For the best user experience, it’s better to disable this setting and redirect the user, immediately after payment, to a generic page that, for example, states that an email will be sent shortly with further information on how the tickets can be downloaded or personalized.
For PayPal, it is advisable to turn this flag off, since the payment confirmation is often not delivered to Fast Events within 5 seconds.
Currency
The three‑character currency code (e.g., EUR) must be a valid ISO 4217 code. Check with you payment provider whether your currency code is supported.
Currency symbol
For example €.
Refund costs
If you do refunds in the Orders overview. This amount is deducted from the reimbursement.
Cost per
The refund costs can be per Order or per Ticket.
Expire time
This timer indicates how long an order can remain open. While the order is open, the tickets are locked. However, once the timer expires,
the order is cancelled (expired status) and the tickets are released again.
Cancel URL
The page to which the user is redirected when the payment is canceled or when the browser’s back button is used. In that case, the order receives the status canceled.
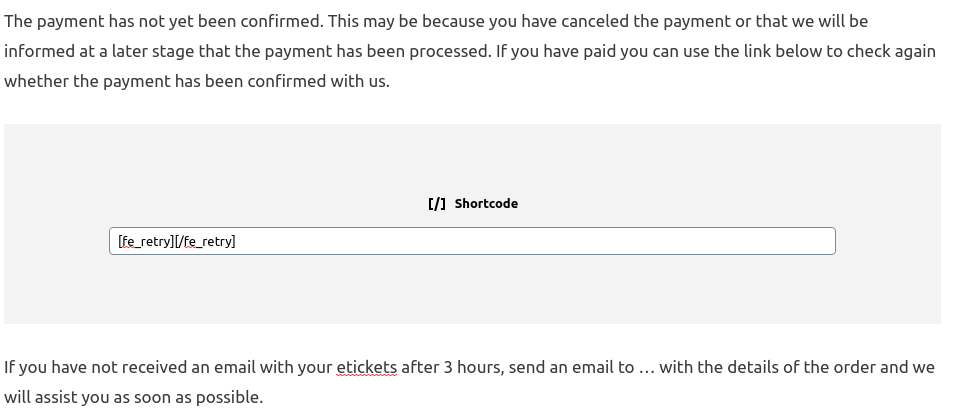
Error page
The Error page is the page where users end up if:
The customer cancels the payment or if they left the payment-screen open for a long time and it times out. Timeout periods can differ per payment method.
The customer did pay, but the Payment provider has not yet informed the plugin that the payment succeeded. You can provide a shortcode in the page, so the user can check again if the payment came through. See example below.
|
SaaS mode
You can find detailed SaaS information for each payment provider here.
OAuth test
It is used by some OAuth API calls to indicate whether the test environment should be used or not. OAuth API calls are separate from events and therefore do not know whether the test environment is being used.
Client ID
The ID you got when registering the App. For Mollie, the string starts with app_. And for Stripe this is ca_.
Client secret
The secret you got when registering the App. This field is not used by Stripe.
Client fee
This is the application fee (including VAT) that the Payment provider retains and allocates to whoever hosts the Fast Events plugin in SaaS mode.
Client fee per
The fee can be per order or per ticket.
Email settings
|
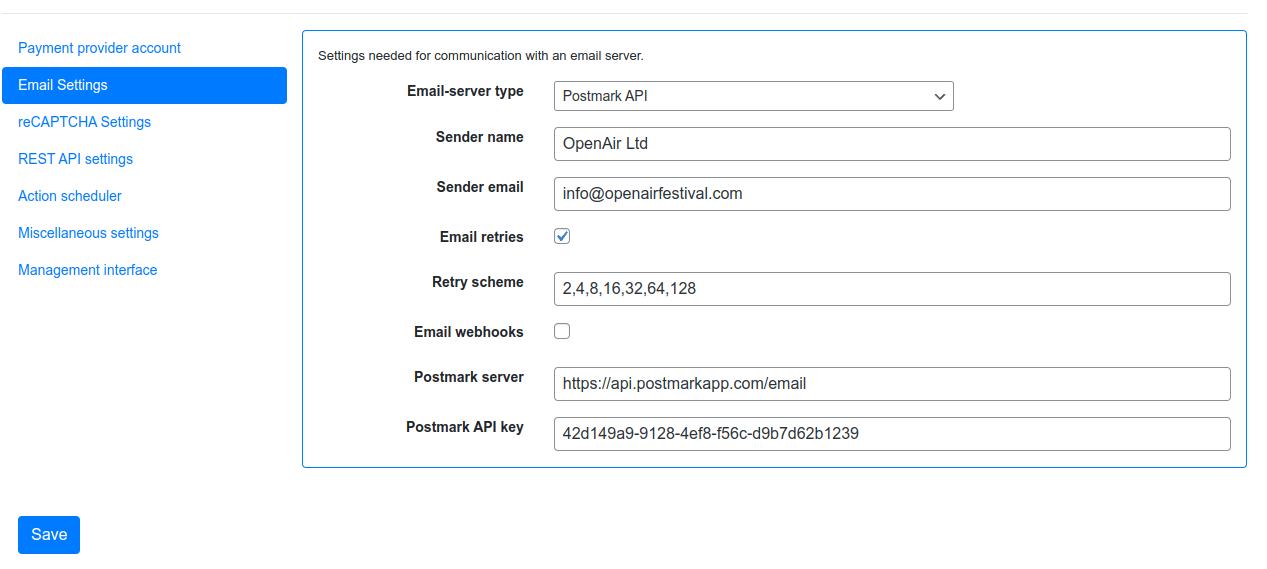
Email-server type
If you choose Host email then it is sufficient to fill in the Sender name and Sender email.
This setting is the default after installation of the plugin.
But choosing the right Email-server type depends to a large extent on how many emails can be sent per day.
Check with you hosting provider how many emails you can send per day (or any other period) and compare this with how many orders (= 1 email) you expect per day.
If the expected amount is more than you can send per day you have to go back to your hosting provider to check if you can upgrade your hosting-package with more emails?
Or you can use professional companies that can send your email, such as Amazon SES, Mailgun,
Sendgrid, Postmark App, … and many more. If you go down this path, you can choose for
the other Email-server type options. SMTP is always possible for all email providers, but we have a number of native implementation as well,
which are the faster counterpart of SMTP as this is a rather ‘chatty’ protocol.
Sender name and email
The name and emailaddress you recipients will see in the received tickets email.
Email retries
Fast Events can be configured to keep retrying to send new order emails. Checking this option is only wise if you are using SMTP or one of the native APIs.
The Host email solution uses the MTA on the host itself and, if everything is configured correctly, will never return an error.
With Host email possible hard-bounces (for example: emailaddress doesn’t exists) or soft-bounces (for example: mailbox full) will be send back to the sender (Send email).
With SMTP or the native API’s there can be errors. For example the host may be (temporary) unreachable, too many request per time-period, … Consult you API provider for other possible errors. In case of errors you have 2 options:
Use the fast_events_email_api_result webhook to inform the WordPress Admin (or another user) that something went wrong
Check the checkbox Email retries and Fast Events will retry sending the email to the SMTP or API-provider again. It will use the
Retry schemeto schedule the next retry.
Retry scheme
The default value is 2,4,8,16,32,64,128, which means the first retry is scheduled after 2 minutes, and then 4 minutes, and so on.
You can define your own scheme.
Consult you SMTP or API provider how it handles hard-bounces and soft-bounces. Usually they provide webhooks to process these bounces.
Email webhooks
Enable this if you want include error notification events (bounces, spam reports, …) from the email-provider, in the errorlog.
Potential error-events are visible in the Tools section of the FE Admin App.
For the moment webhooks are only supported for Postmark, Mailgun, Mailjet, SMTP2GO, Brevo and Sendgrid.
See Email webhooks
Use queuing
The default configuration uses synchronous email delivery. This means that if the email server takes a few seconds to respond to a send‑request, the end user has to wait as well. Setting this checkbox means that the send request is placed in the action‑scheduler’s queue and control returns to the end user immediately. The action scheduler processes the queue in the background, so the end user won’t notice any delays even if the email server is slow. Nevertheless, it’s good practice to keep an eye on the performance of the email server. Long response times tie up resources for the duration of the request. Sub‑second response times are absolutely necessary for a well‑configured email server.
SMTP settings
Use this configuration for SMTP email access:
{
    "type": "mailer",
    "provider": {
        "class": "FeData\\FastEvents\\Mail\\Provider\\SmtpMailer",
        "server": "mail.example.com",
        "user": "[email protected]",
        "password": "K2uKqNzctwr12uiXayVbxwNr",
        "verify_peer": true,
        "protocol": "tls",
        "port": 587
    }
}
- server
The name of the server. Check with your email-provider.
- user
Most of the time this takes the form of an emailadress. Check with your email-provider.
- password
The password of the account. Check with your email-provider.
- verify_peer
Disabling it and you’ll be vulnerable to a Man-in-the-Middle Attack. Incidentally you may disable it if you are fi. testing with an internal SMTP host with a self-signed certificate.
- protocol
Use
sslortls. Check with your email-provider.- port
Most of the time port
465or587is used. Check with your email-provider.
Amazon SES API settings
The settings can be found in the Amazon console dashboard.
Use this link for the AWS regions that can be used (e.g. eu-west-2).
You can find/create in the Amazon IAM (Identity and Access Management) menu the Access key and Secret key. Make sure the secret key has the right permissions to send email (AmazonSESFullAccess).
{
   "type": "mailer",
   "provider": {
     "class": "FeData\\FastEvents\\Mail\\Provider\\AmazonSesMailer",
     "region": "eu-north-1",
     "access_key": "AKIASA9QWIUXC4CYJUDE",
     "secret_key": "MBThasbB0x/6gesCOwrs0wslrjuwqsJbN"
   }
}
Brevo API settings
The settings can be found in the Brevo dashboard. This is the standard configuration:
{
   "type": "mailer",
   "provider": {
     "class": "FeData\\FastEvents\\Mail\\Provider\\BrevoMailer",
     "server": "https://api.brevo.com/v3/smtp/email",
     "api_key": "xkeysib-6a9ede3...7b70104d-VjaOgOC4cPNQJm"
   }
}
Replace the api_key with the one from your Brevo dashboard.
Mailgun API settings
The settings can be found in the Mailgun dashboard. If for example your domain is somedomain.com. The configuration would be:
{
   "type": "mailer",
   "provider": {
     "class": "FeData\\FastEvents\\Mail\\Provider\\MailgunMailer",
     "server": "https://api.eu.mailgun.net/v3/mg.somedomain.com/messages",
     "api_key": "ec611668-9581-490d-91bc-cf9911494a4f"
   }
}
If you create a new sending domain, be sure to set it up in Mailgun’s EU region when you are residing in the European Union.
If you don’t host your domain in the European union (USA flag in dashboard), you have to strip the eu part from the URL.
This of course will also works, but it adds some latency to the API request. The ‘mg‘ part depends on your DNS settings.
Replace the api_key with the one from your Mailgun dashboard.
Mailjet API settings
The settings can be found in the Mailjet dashboard. This is the standard configuration:
{
    "type": "mailer",
    "provider": {
        "class": "FeData\\FastEvents\\Mail\\Provider\\MailjetMailer",
        "server": "https://api.mailjet.com/v3.1/send",
        "api_key": "7a8e12:1234a1"
    }
}
The api_key is the combination of the user identifier and API key, separated by a colon. For example 7a8e12:1234a1
Postmark API settings
The settings can be found in the Postmark dashboard. This is the standard configuration:
{
   "type": "mailer",
   "provider": {
     "class": "FeData\\FastEvents\\Mail\\Provider\\PostmarkMailer",
     "server": "https://api.postmarkapp.com/email",
     "api_key": "207cd90f-b9ae-42e7-9dab-f5a717a8cc97"
   }
}
Replace the api_key with the one from your Postmark dashboard.
Sendgrid API settings
The settings can be found in the Sendgrid dashboard. This is the standard configuration:
{
   "type": "mailer",
   "provider": {
     "class": "FeData\\FastEvents\\Mail\\Provider\\SendgridMailer",
     "server": "https://api.sendgrid.com/v3/mail/send",
     "api_key": "SG.3f15e688-eb42-487f-884a-e8750b64c80b"
   }
}
Replace the api_key with the one from your Sendgrid dashboard.
SMTP2GO API settings
The settings can be found in the SMTP2GO dashboard. This is the standard configuration:
{
   "type": "mailer",
   "provider": {
     "class": "FeData\\FastEvents\\Mail\\Provider\\Smtp2GoMailer",
     "server": "https://api.smtp2go.com/v3/email/send",
     "api_key": "f4be40b4-e87b-428f-bda7-3267f86f3694"
   }
}
Aside from the Global URL, requests may be prefixed with one of the following base URL’s:
Region
Server URL
Global
US (United States)
EU (European Union)
AU (Oceania)
Replace the api_key with the one from your SMTP2GO dashboard.
Sparkpost API settings
The settings can be found in the Sparkpost dashboard. This is the standard configuration:
{
   "type": "mailer",
   "provider": {
     "class": "FeData\\FastEvents\\Mail\\Provider\\SparkpostMailer",
     "server": "https://api.eu.sparkpost.com/api/v1/transmissions",
     "api_key": "7f3d82fe-ddff-4aa3-b0a0-d46c51357cf2"
   }
}
If you don’t host your domain in the European union, you have to strip the eu part from the URL.
Replace the api_key with the one from your Sparkpost dashboard.
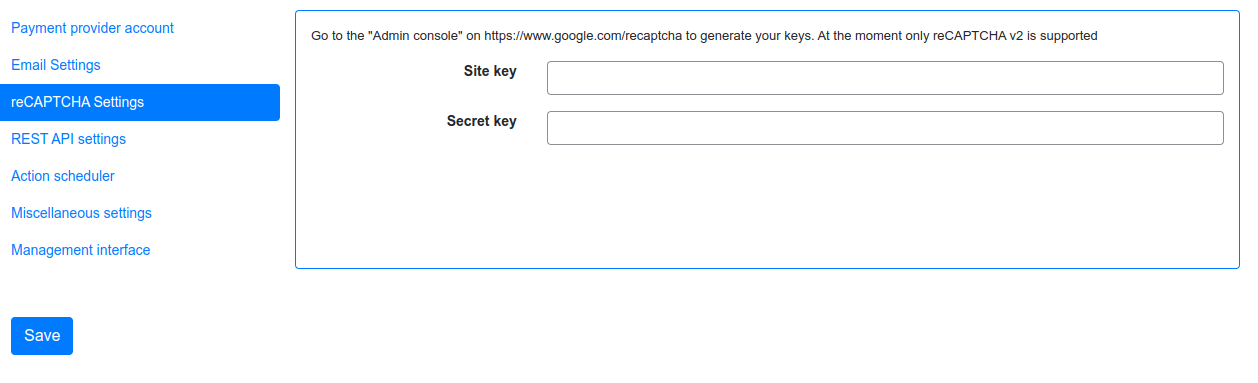
ReCAPTCHA settings
|
With RSVP events, it is possible for people to spam you with all sorts of real or fake email addresses, even if you have confirmations turned on. Worse, they may give you a bad reputation, and the receiving domains may flag you as a spammer.
For these cases you can use Google reCAPTCHA or Cloudflare Turnstile. Sign in and setup up your domain. Fast Events only supports Google ReCaptcha v2 checkbox at the moment. Once setup, copy the keys to the Site key and Secret key. Switch on the ReCaptcha flag in the Event settings and the booking screen will have a ReCaptcha.
You must have a valid account with either Cloudflare or Google.
REST API settings
|
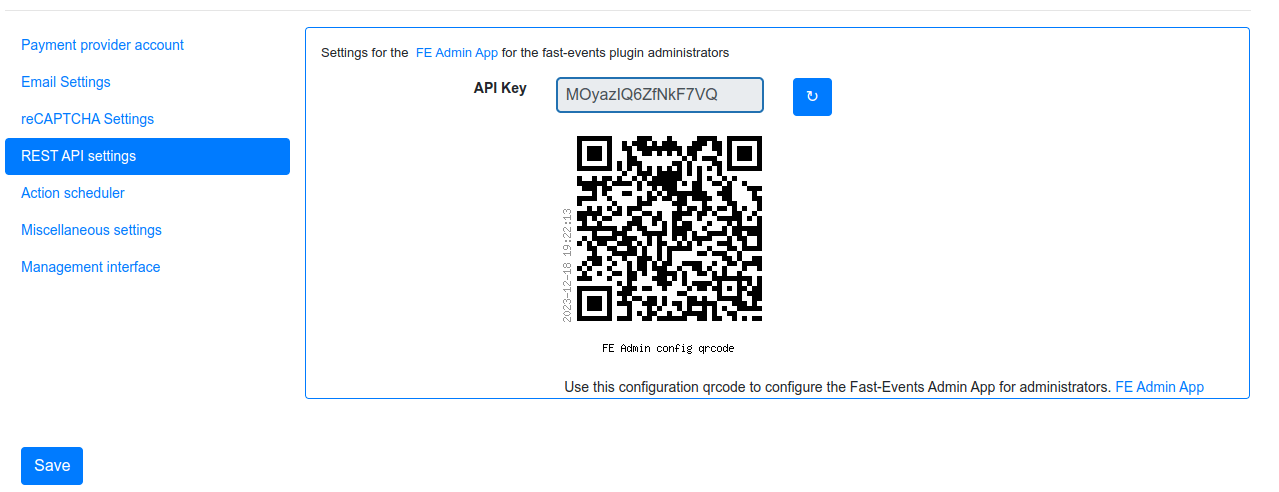
These settings work together with the FE Admin App and WordPress users who have an administrator role.
The App can be used on your mobile/tablet or desktop browser to perform event and order management and access to all tools
API key
The secret key the FE Admin App has to use to secure the communication. You can use the button to generate a new secure token. If printed or shown, users can scan it with the camera to configure a new server in the app.
Action scheduler
|
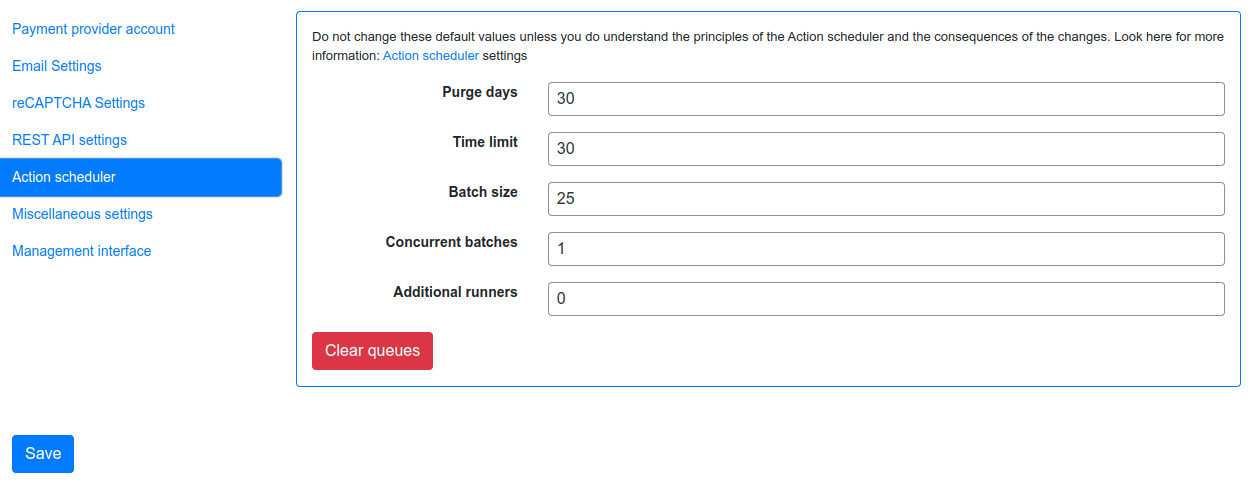
Fast Events uses the Action scheduler for delivering webhook information, retries to send emails and timed RSVP events.
Do not make any changes to these parameters until you have a good understanding of how the Action scheduler works and the consequences of the changes. You can find here more information for a detailed explanation. In case you do fully understand it, make the changes and test!
Bear in mind that the Action scheduler can be used by multiple plugins. Make sure to know how these plugins interact with the Action scheduler.
The defaults will do fine for small events, but if you have an event with thousands of orders in a short time frame or scanning requests and webhook consumers for these events, you may consider different settings.
Purge days
After 30 days completed actions will be removed from the logs. With the Fast Events plugin you could bring this value down to a lower level. Check for the longest retry schedule you use in sending your email, in webhooks or timed RSVP events. But also check other plugins using the Action scheduler, if any.
Time limit
Most shared hosting environments allow a maximum of 30 seconds execution time for a job. If this is different in your situation you can change this. But don’t forget: long running actions also tie up resources for a long time!
Batch size
By default if a queue starts running it processes 25 actions. This means with the previous parameter Time limit,
that the system has 30 seconds to process the 25 actions.
But the actions issued by Fast Events should finish in a fraction of a second.
If you hook up new webhook consumers tell them to return a HTTP 200 response as soon as possible and
not do first all kinds of processing and then return a HTTP 200. If you switch on logging for a webhook,
you can find the full analysis of the webhook including the duration.
If this is close to 1 second or even bigger, then there is a serious issue.
Concurrent batches
The default is 1. You could increase this, but before you do make sure your webhook consumers can coop with multiple simultaneous connections. This parameter works together with the next one.
Additional runners
Because the Action scheduler is only triggered at most once every minute by WP Cron, it rarely happens that multiple concurrent batches are running at the same time. With this parameter you can force Action scheduler to start additional queues at the same time.
Clear queues
The Clear queues button removes all tasks in all Fast Events plugin queues and resets the periodic cleanup job.
Check
The Check button verifies whether the recurring tasks of Fast Events are stil present, and if they are not, it recreates them.
Encryption settings
|
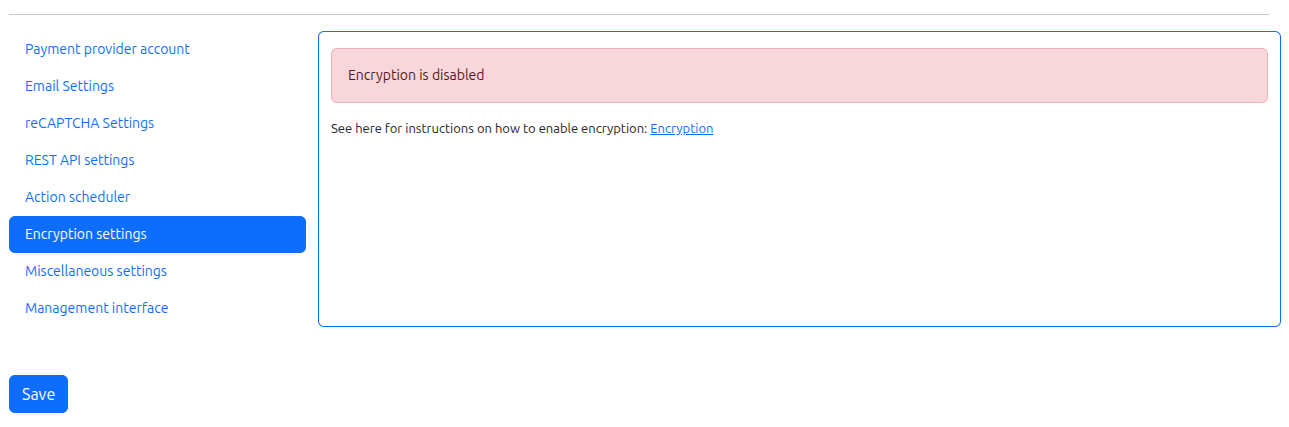
Optionally, encryption can be enabled for sensitive information such as plugin settings, Fast Events user information, and SaaS information (when SaaS is enabled).
You have to add two additional constants to the wp-config.php file: FAST_EVENTS_KEY and FAST_EVENTS_SALT. These keys can receive any combination of characters, preferably at least 32 characters.
Warning
Once set, they should never be changed. If you change or lose the keys, the data can no longer be decrypted.
An easy way to get to solid values for these constants is to copy some of the values from https://api.wordpress.org/secret-key/1.1/salt/ and use them. Eventually, you should have additional code like the following in your wp-config.php file:
1define( 'FAST_EVENTS_KEY', 'put your unique phrase here' );
2define( 'FAST_EVENTS_SALT', 'put your unique phrase here' );
Extreme care should always be taken when editing your wp-config.php file. Before editing this file, we strongly recommend generating a back-up copy of your full site as well as a copy of your wp-config.php file in the event that you need to undo any changes. If you’re unsure about how to do this, please speak with your web designer or technical contact.
Once you have made the necessary changes, refresh the page and it should show that encryption is enabled.
Unencrypted data will be encrypted as soon as it is changed, but a quick fix is to save the plugin settings — even if you didn’t modify anything. Modify and save Fast Events (sub)accounts via Tools -> Accounts
Logging settings
|
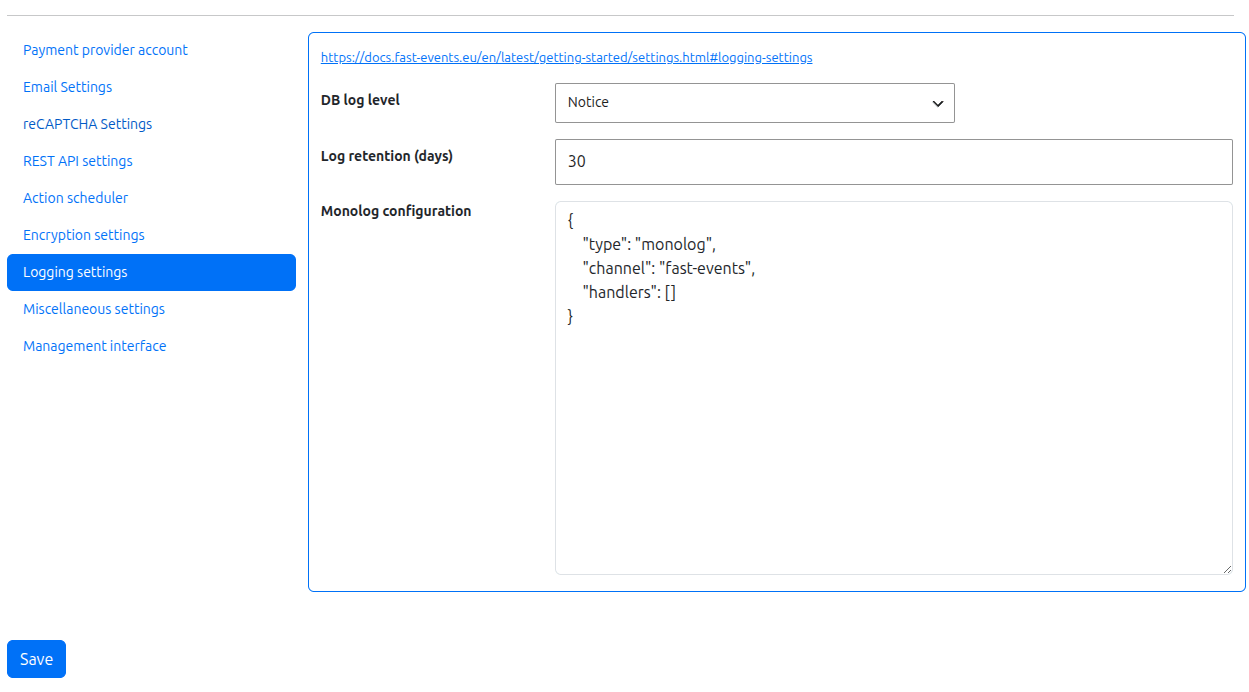
Fast Events logging is PSR-3 compliant. It always writes each log message to the Fast Event log table. Monolog is used for logging, and this configuration allows defining various additional log methods.
DB log level
The default loglevel for the Fast Events log table is notice. This is the order of the levels:
emergency
alert
critical
error
warning
notice
info
debug
If you set the level to notice, all log messages with levels from emergency up to and including notice are recorded,
while info and debug messages are omitted.
Log retention (days)
By default, all log entries are deleted after 30 days. Enter a value here for how many days you want to retain the log entries.
Monolog configuration
The default Monolog configuration is the JSON content shown below.
1 {
2   "type": "monolog",
3   "channel": "fast-events",
4   "handlers": []
5 }
With this configuration option, and in addition to the default Fast Events logging, you can send your logs to files, sockets, inboxes, databases, and various web services.
This example shows additional logging to a file that rotates daily (every 24 hours) and retains up to 30 rotated files.
Additionally, it logs alert level messages and any messages of higher severity to syslog.
 1 {
 2   "type": "monolog",
 3   "channel": "fast-events",
 4   "handlers": [
 5     {
 6       "class": "Monolog\\Handler\\RotatingFileHandler",
 7       "args": [
 8         "/tmp/daily.log",
 9         30,
10         "notice"
11       ]
12     },
13     {
14       "class": "Monolog\\Handler\\SyslogHandler",
15       "args": [
16         "fast-events",
17         8,
18         "alert"
19       ]
20     }
21   ]
22 }
Be sure to enter valid JSON, and you can verify it with online tools such as https://jsonbeautifier.org
All handlers you define follow this structure.
Each handler must contain a class property (a string) and an args property (an array).
Even when a handler takes no arguments, you still need to provide an empty array for args.
Be sure to escape the class property, which is why the example uses double backslashes.
To define additional handlers, refer to the Monolog documentation here: https://seldaek.github.io/monolog/doc/02-handlers-formatters-processors.html
Check the handler’s __construct method to see which arguments it accepts.
If you save the settings, Fast Events will perform basic checks—such as validating the syntax and confirming that the handler class exists—but it won’t verify the constructor arguments.
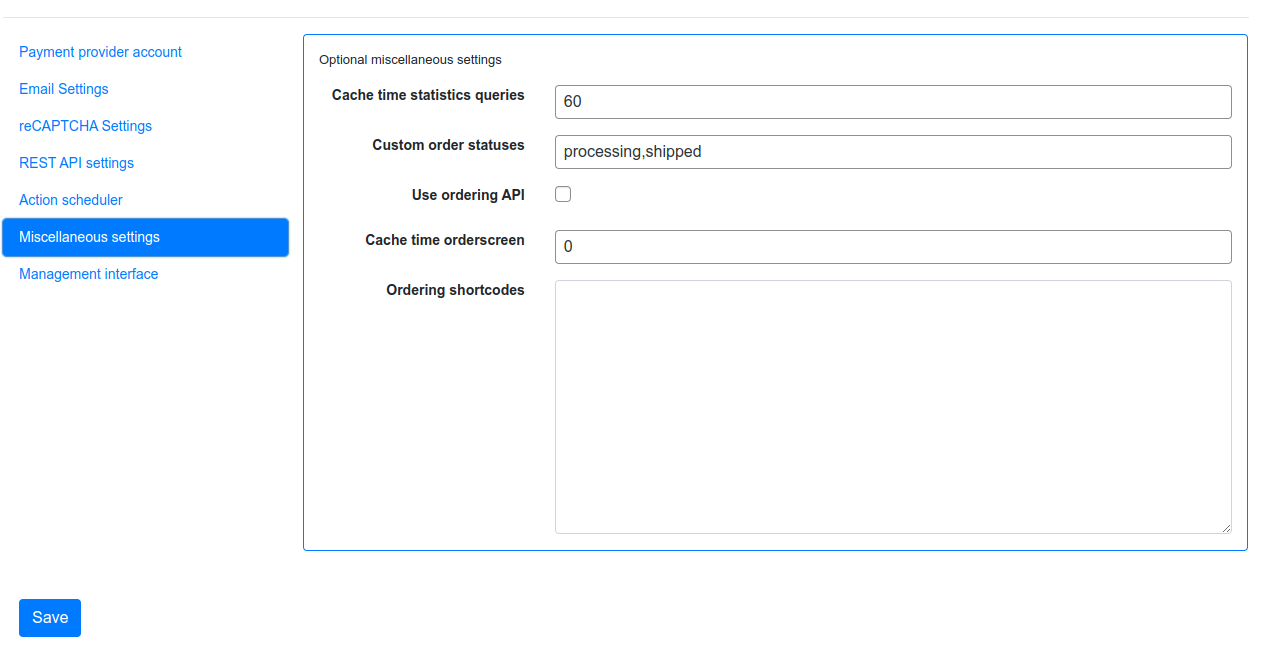
Miscellaneous settings
|
Daily orders cleanup
By checking this box, all orders with the payment status ‘expired’, ‘cancelled’, or ‘failed’ are deleted daily.
Cache time statistics queries
Some queries, such as a scan overview and the overview of payment statuses, are fairly intensive according to the amount of orders that are there. This option allows you to cache the results for a certain period of time. The default value is 60 seconds.
Custom order statuses
A list of custom statutes separated by a comma. The length of a single status should be 32 characters or less.
You can use the custom status fields in the contextmenu of the order-table.
Fi. use it as reminder for calling back a customer after an earlier call. For example, the field could be filled with callback,call finished.
You can then easily find the actions by searching in the orders overview.
It is added at the end of the Order status field as, for example, paid (processing).
But you can also use it if you occasionally want to sell a book or whatever. Then use, for example, the statuses processing, shipped.
Use ordering API
By enabling this setting, it is possible to use the WordPress Fast Event plugin as a REST API backend in a custom front‑end system that is not based on WordPress. See ordering API for the specification. It works together with the Shortcode tool.
Cache time orderscreen
Optional specify how many seconds the orderform needs to be cached.
This option is not using WordPress as cache, but relies on an intermediate cache like Cloudflare or others.
For example, if you specify 60 (=60 seconds), an HTTP header is generated such as: Cache-Control: public, max-age=60, s-max-age=60.
Management interface

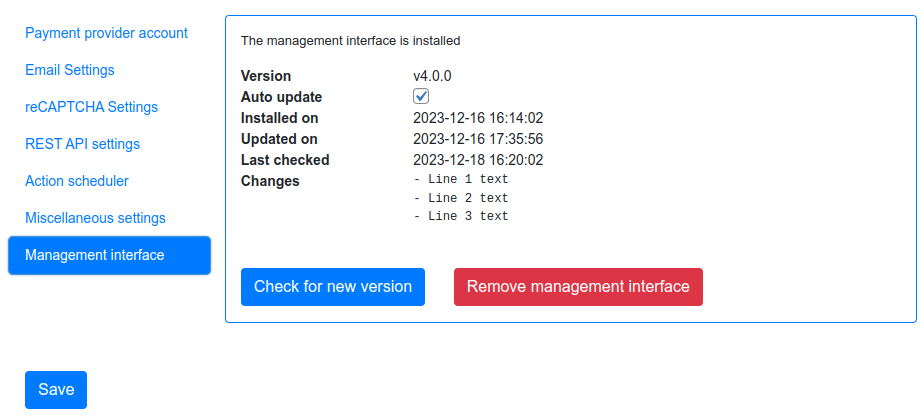
As of version 2.0, the plugin’s management interface is no longer bundled with the plugin. You can install the management interface separately from this menu, and it will stay up‑to‑date automatically. The other option is to use the FE Admin App for Android and IOS phones/tablets and not install the Web interface. This App contains exactly the same functionality as the Web interface.
To install the App for WordPress administrator users, click here.
But of course you can also do both, i.e. use both the Web interface and the App.
If you install the web version, you can specify whether you want it to update automatically by selecting the auto-update checkbox.
You can also check manually by pressing the Check for new version button.
If a new version is available, you will be asked if you want to install it.